2019 Two Car Garage Workshop Tour
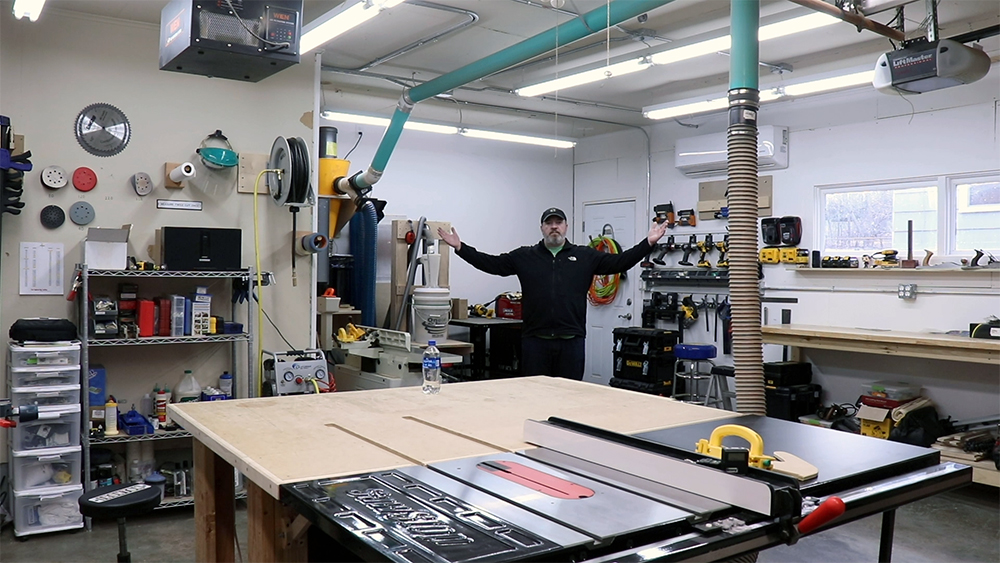
It’s high time I did a shop tour of my two car garage workshop. So here we go!
Shop Floorplan – Two Car Garage Workshop
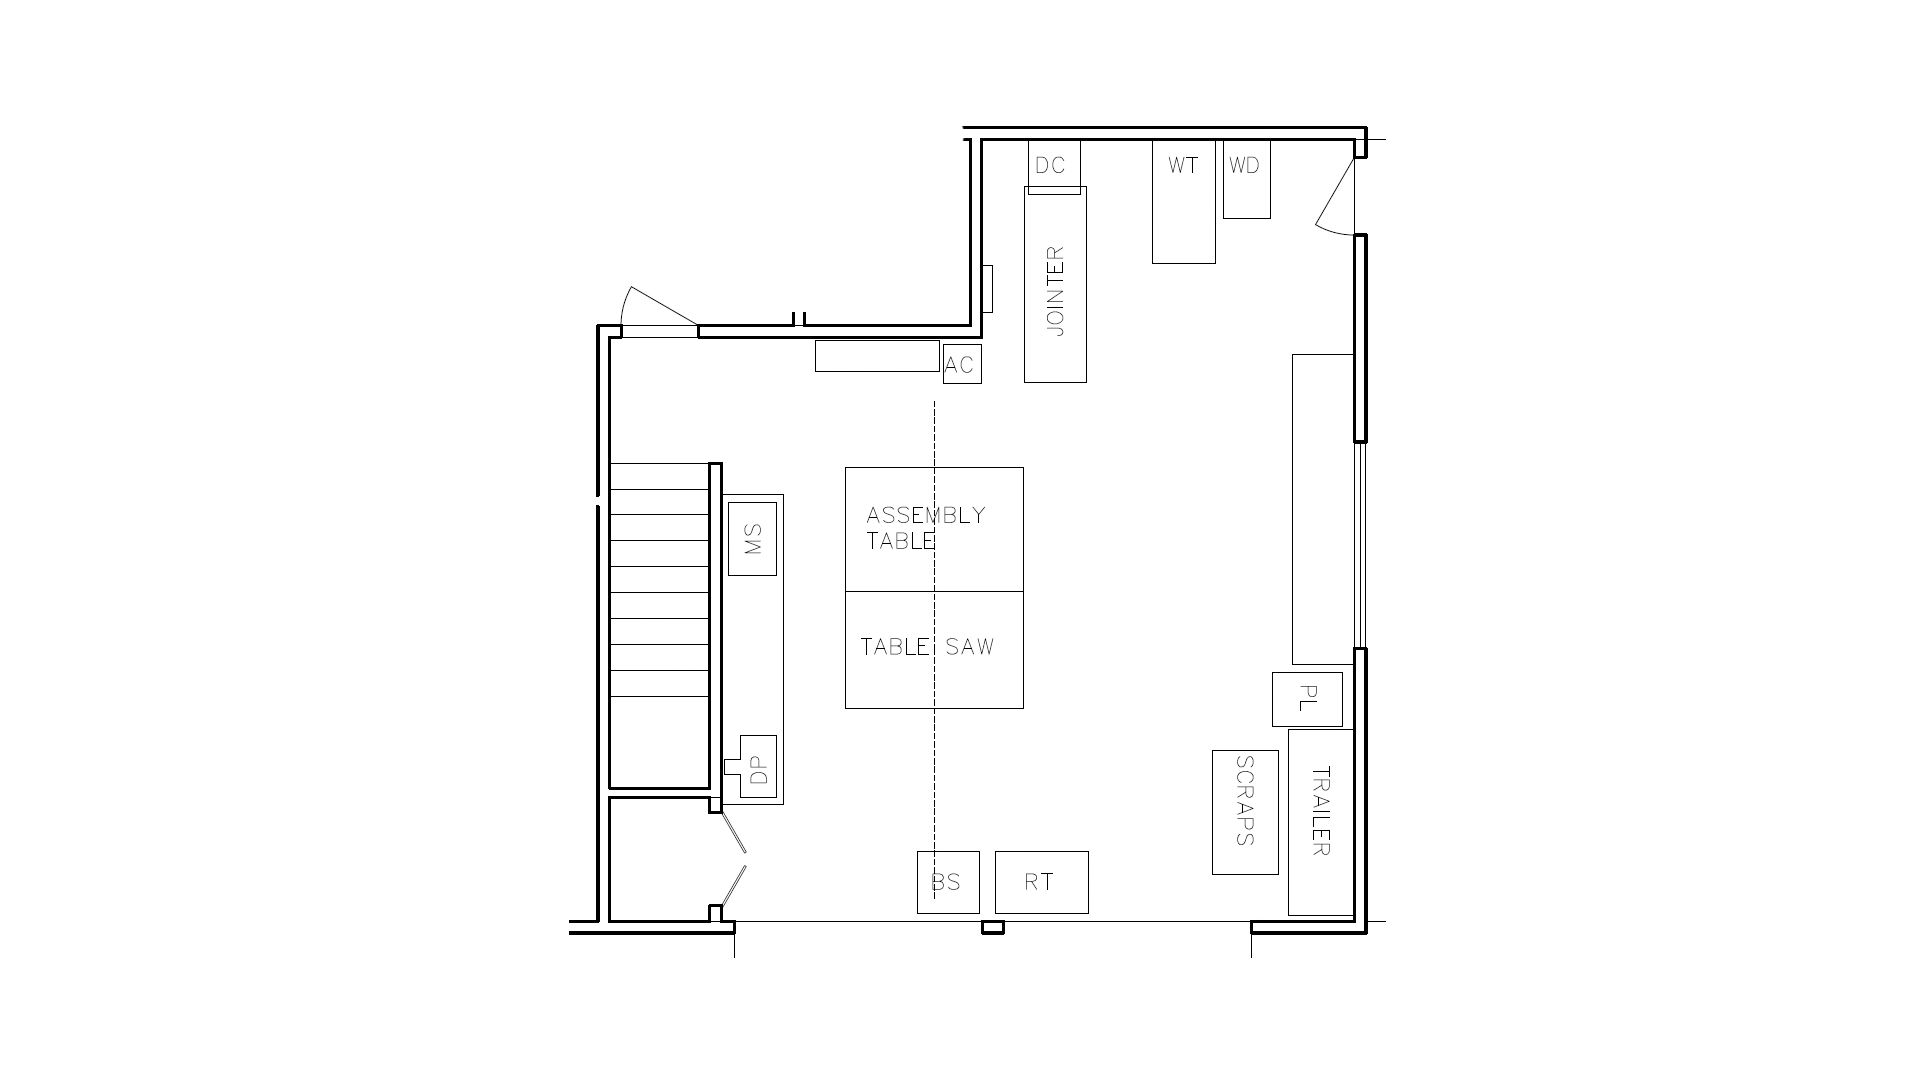
Like many of you probably, I have a two car garage workshop. It is 479 square feet. If not for that bump out at the top of the plan it would be awfully tight in my shop. Thankfully, that bump out gives me a lot much needed space. I have a feeling that at some point this garage was modified. If you were to pull a car into the left hand door I don’t think it would be possible to get out unless you were driving an extremely small car and were an extremely small person. So it’s a little tight for a two car garage.
I keep the right side of the garage as open as possible. It’s where I use my track saw to break down sheets of plywood and where I pull out other larger tools for working such as my jointer, planer, welder, bandsaw and router table. It also allows me to move just a few things around and I can get my car into the garage in bad weather.
Floorplan
How it all began – Two Car Garage Workshop
I bought this house in the spring of 2016. From the moment I bought it I had visions of doing some renovations. After living in it a few months I was ready to start tackling some projects. This was near the end of 2016 and my office is closed between Christmas and New Year’s so I decided to take that week to tackle my first project. There was once a really nasty, old cabinet in the bumped out portion of my garage and I decided to remove it and put a little workbench in its place.
Diving in
Once I removed the cabinet I realized that the walls behind it were in really bad shape, there were no outlets and no lights. I had never done any drywall or electrical work so this seemed like a great project to start learning. If I screwed up the drywall, it was just my garage so no real harm there. My electrical panel is directly below where my now sub panel is which you can see in the image below so it was going to be an easy run.
When the drywall and electrical was done I turned my attention to a workbench which lead me to watching countless videos on YouTube on workbench construction. I was hooked. I couldn’t stop watching YouTube videos about woodworking! With every video I had new ideas but I realized I’d need more tools to bring those ideas to life so I slowly started on my tool collection. I already had an older Craftsman 14 piece cordless tool set (circular saw, drill, driver, recip saw, etc), some mechanics tools and a 10″ Craftsman miter saw. Other than that, I had nothing. My first bigger tool purchase was a Bosch router. However, I knew I was only going to get so far without a table saw so that was my next purchase. More on that later.
My Jump to YouTube
By the middle of 2017 I had watched 100s of hours of videos on YouTube and learned a ton. But one thing that stuck out to me was that there were very few truly beginner videos. So many things talked about in the videos I watched flew right over my head. When I built my assembly table I decided to film it and try to talk like the audience had never done a lick of woodworking. I also wanted to point out my mistakes. This hobby can be seriously intimidating when you watch these videos; the producer is flying through steps, nary a mistake, and at the end they have a perfectly built piece. I really try and put myself into my own shoes as they were two years ago.
Let’s take a look at what I have built and accumulated over those two years in my two car garage workshop.
The Bump Out – Two Car Garage Workshop
Bump Out and Sub Panel
We’ll be starting the tour in the bump out and work our way clockwise around the shop.
The Sub Panel
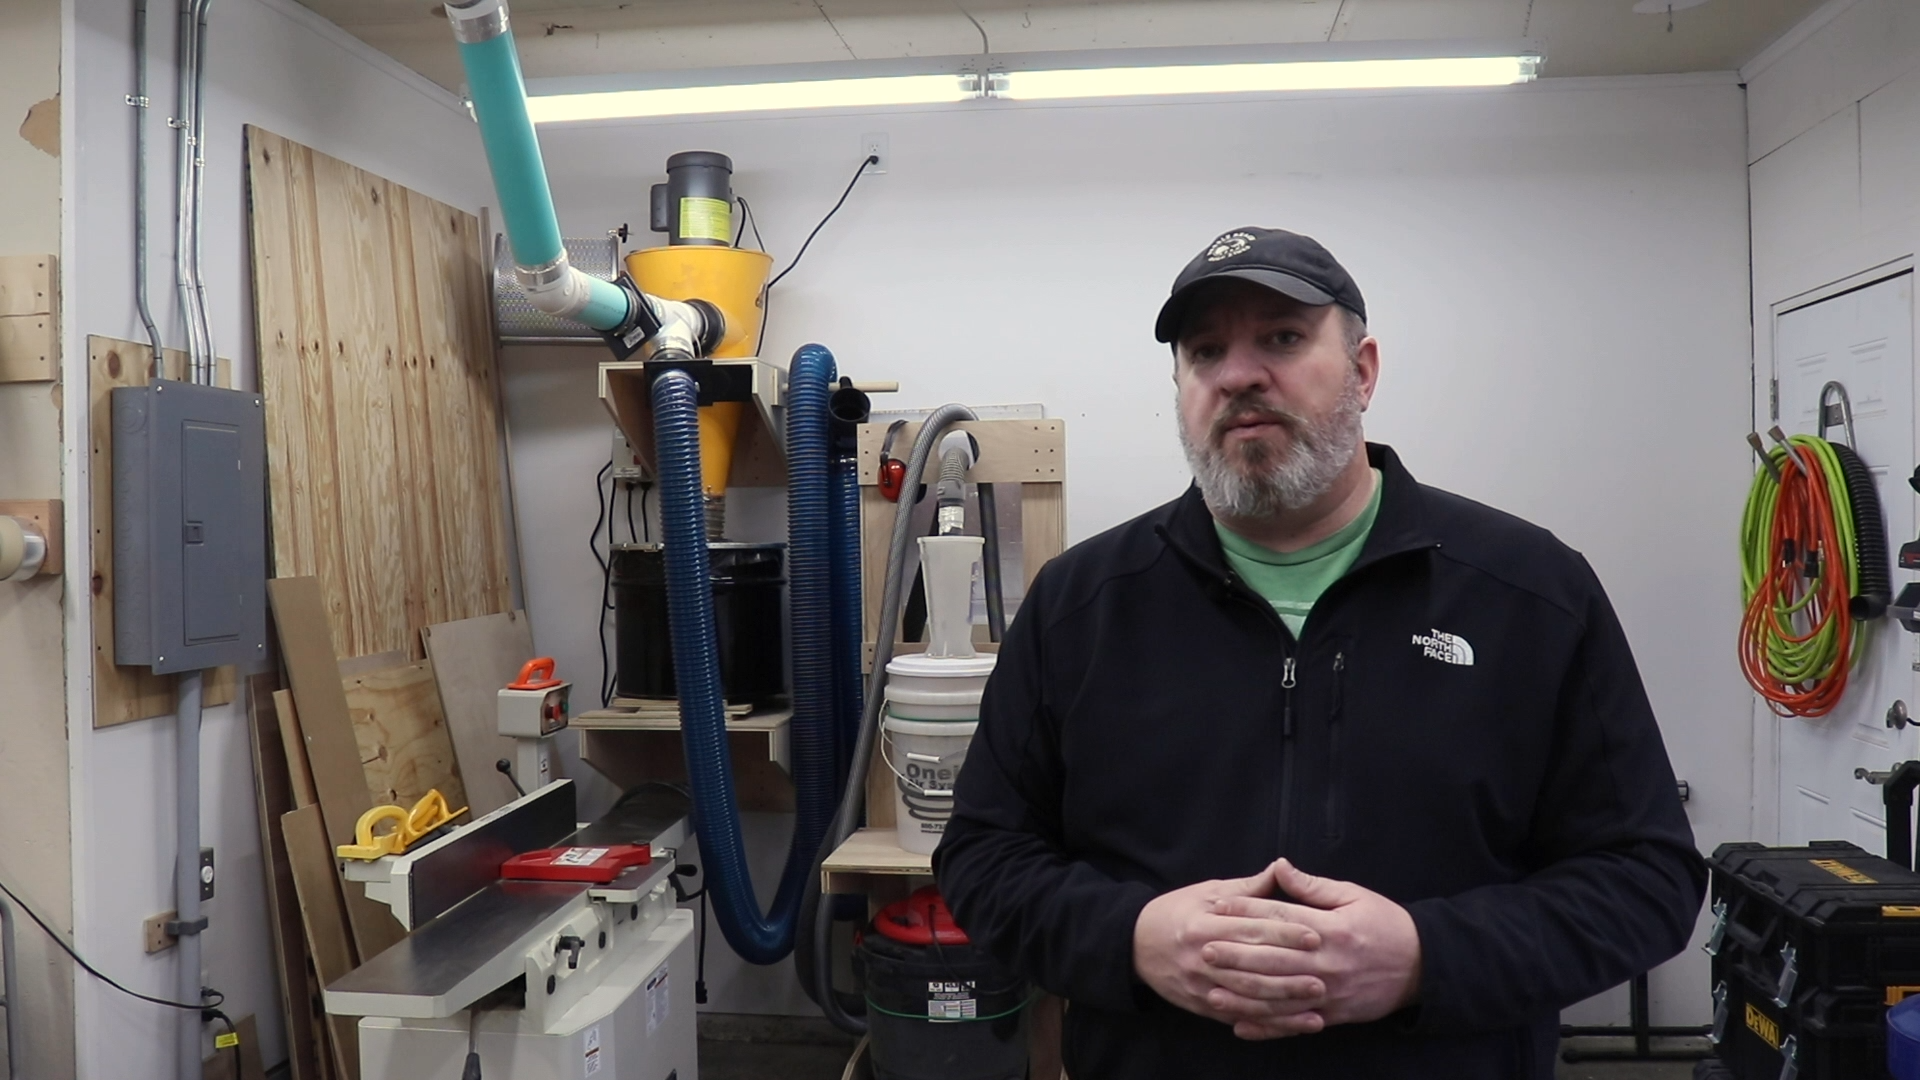
This area is mainly large tool storage as well as my dust collector and some plywood storage. On the left is my sub panel. The first year I worked in here all I had were the outlets I installed on the wall and one light. Extension cords were abundant and a nuisance. It was only a matter of time before I needed more outlets and more power so I decided to tackle a pretty major electrical project.
I was able to find an electrician who would consult on the project for a small fee. He came out and looked at what I wanted to do, ran through what I should do, made a list of materials, and pulled a permit. When I ran into a problem I could call him and he would either answer it over the phone or come out and take a look at the issue. I believe he ended up coming out to my shop two times for questions and then one final time to do an inspection before the city’s inspection.
The sub panel is 100 amps. It feeds a total of four 110v circuits (two on each side of the top), two lighting circuits, and three 220v lines which run to my table saw, jointer, and mini split. I will soon be adding more lighting and another 220v circuit for my welder. This was a great addition to my shop. I now had plenty of power and plenty of lighting which can be scarce in garages. The sub panel was a really fun project and I learned a lot and it also saved me a ton of cash! I was looking at around $3500 to have all of this done had I hired it all out. I believe I spent $500-700!

East Wall Outlets
Oneida Mini Gorilla Dust Collector
Oneida Mini Gorilla
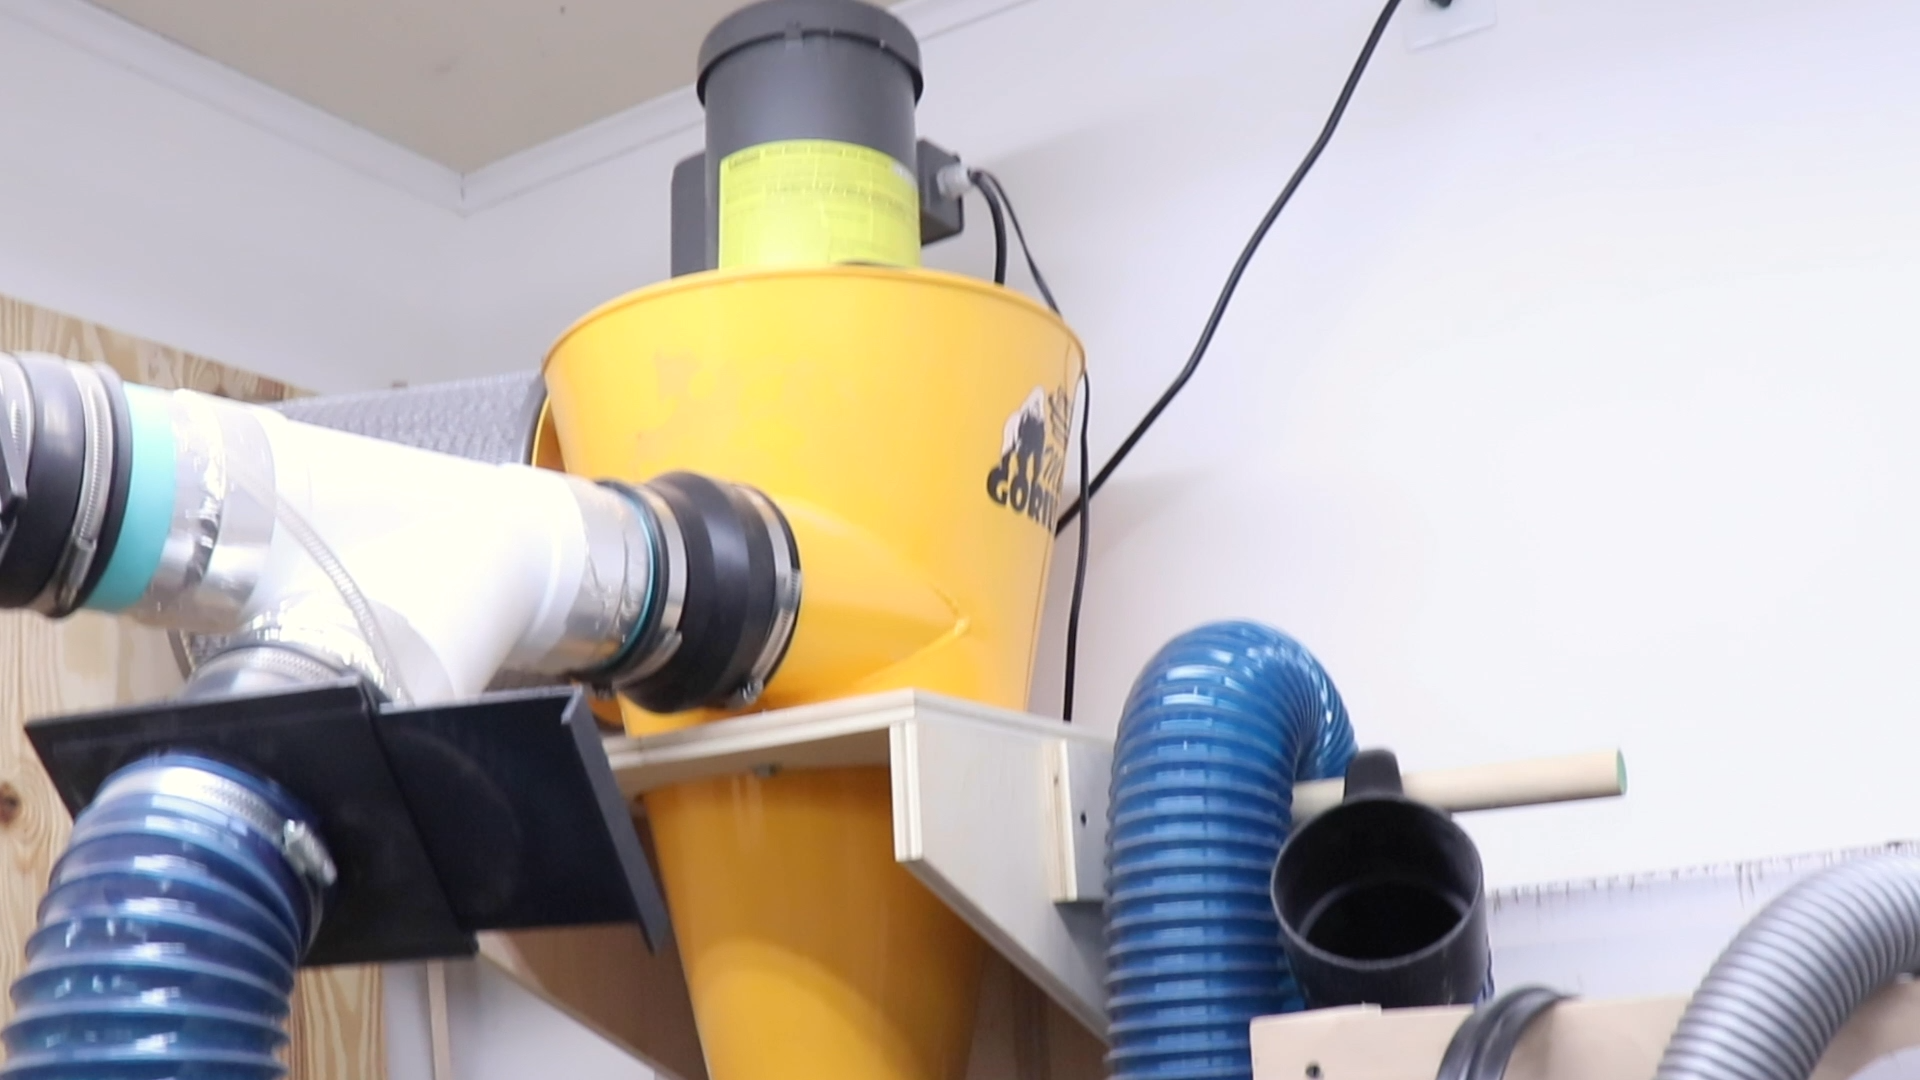
My dust collector is an Oneida Mini Gorilla (https://amzn.to/2T9jXnz). This was one of the few used tool purchases I have made. I’ve looked for used in a lot of instances but haven’t had a ton of luck. I was initially looking for a DeWalt 735 planer and ran across an ad on Craigslist for it and this dust collector as a package deal. Both were very lightly used so I jumped immediately. It’s a 1.5 horsepower cyclone dust collector and it’s meant to be mobile but I decided to mount it on the wall because it always seemed to be in the way.
It has a ducted run to my table saw and then every other tool gets connected via a Rockler expandable hose (https://amzn.to/2OaRJbg) which utilizes the Rockler Dust Right (https://amzn.to/2Y4oRpN) quick connect fittings. Overall, while better than a shop vac, I am not wild about this dust collector. A larger system is hopefully going to happen in the future.
Steelex ST1011 8″ Jointer

Steelex ST1011 8 Inch Jointer
My jointer is a Steelex ST1011 with an 8″ spiral cutterhead and parallelogram beds. Steelex is part of the Woodstock International family of companies which also owns Grizzly. This jointer is a clone of the Grizzly G0490X which is in turn a clone of the Delta DJ-20. Shop Fox is also part of Woodstock and offers a similar jointer. The biggest differences between Steelex/Shop Fox and Grizzly is that the former are sold through dealers and the latter sells direct to consumer. The other big difference is that Steelex and Shop Fox have a two year warranty compared to one with Grizzly. All three brands are serviced by Grizzly if there is an issue and their customer service is excellent.
I really like this jointer. I don’t have a lot to compare it to other than what I used way back in high school but it’s been great for me.
Shop Vac Cart

Shop Vac Cart and Metal Working Tools
My shop vac cart is a slightly modified version of Jay Bates’s shop vac cart. A big hat tip to Jay because this thing is great. It saves a lot of space by stacking the cyclone on top of the shop vac and also provides a place to store all of the attachments. There’s something about shop vacs that make them an absolute pain in the ass to use (cords and hoses getting tangled, crappy casters, etc). This cart solves all of those issues.
Lincoln Electric Power Mig 210 MP Welder
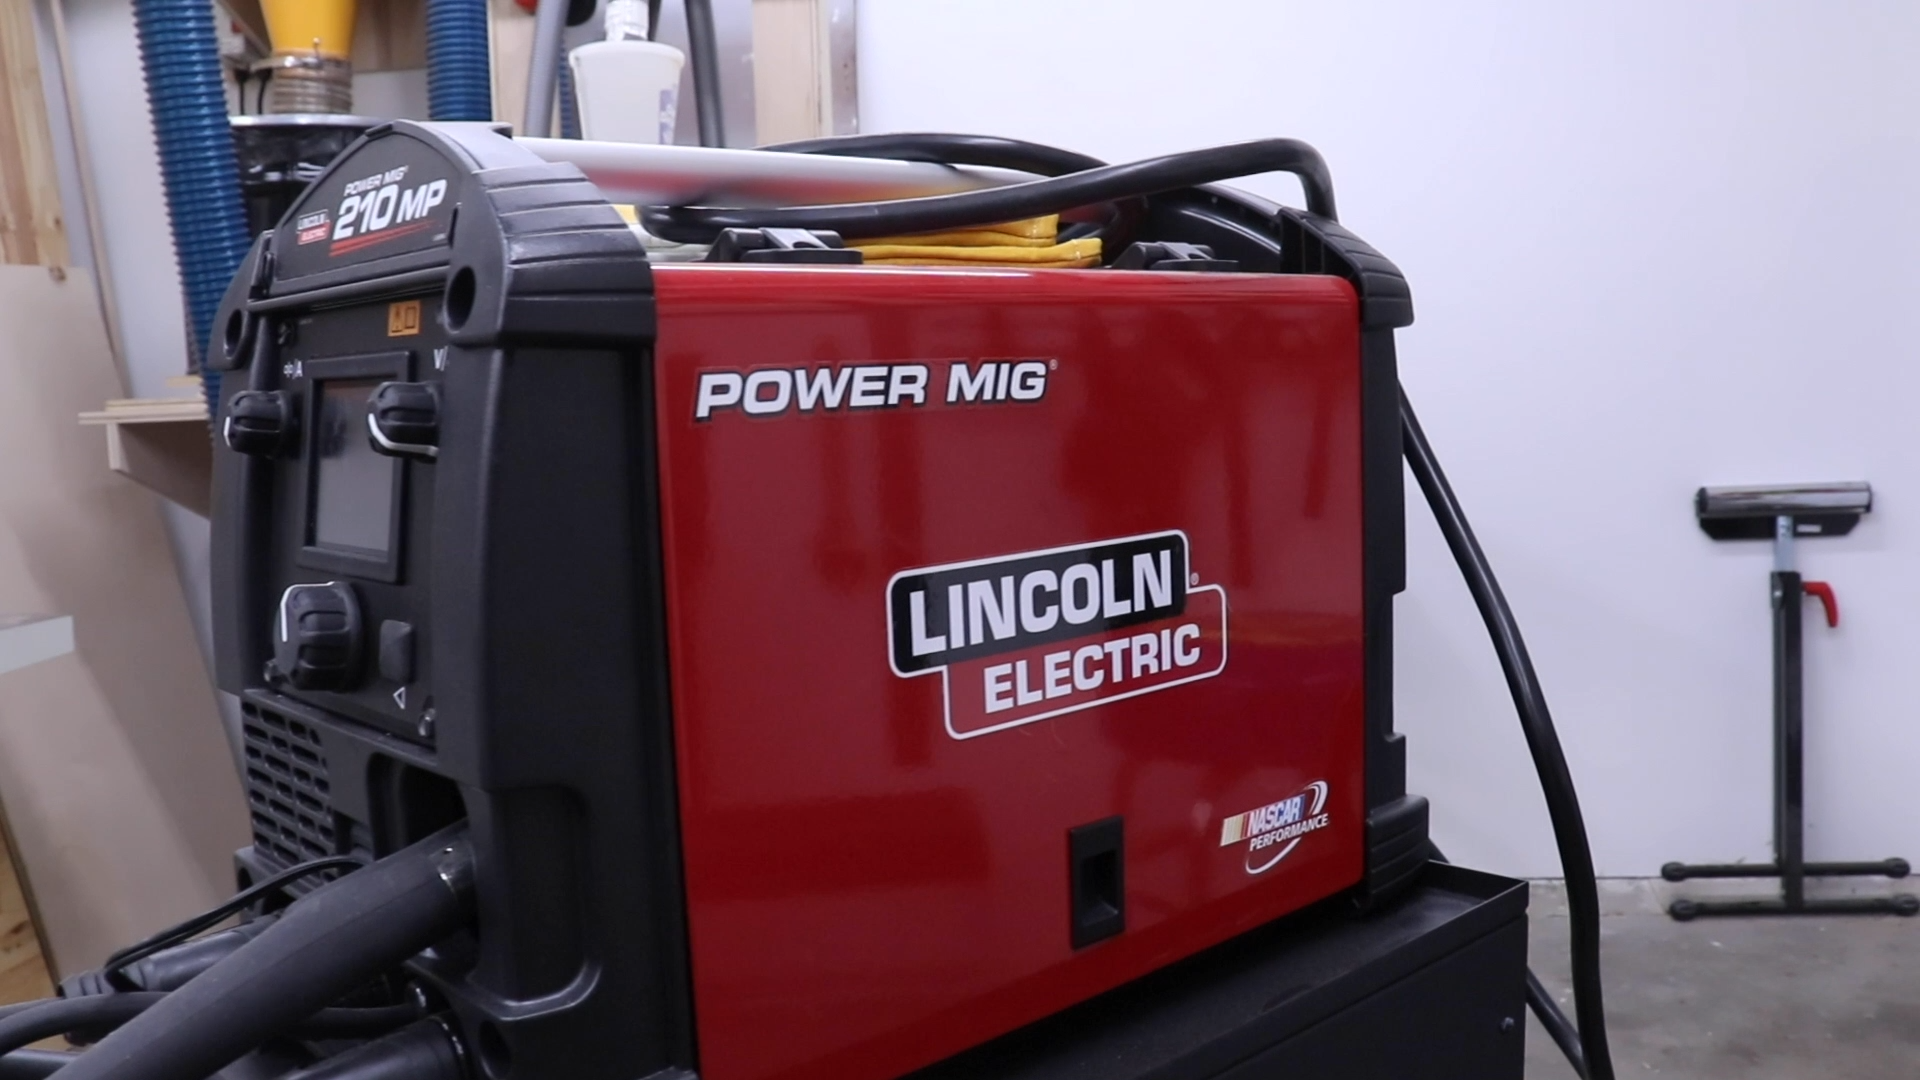
Lincoln Power Mig 210MP
I knew at some point I wanted to get a welder. I did quite a bit of welding in high school and really enjoyed it. Back in November, Lincoln Electric was offering a great deal on this welder so I bought it a little sooner than I was planning on getting a welder. This is the Power Mig 210 MP (https://amzn.to/2UG4L2X)at it is a multi process welder which means it does MIG, TIG and stick welding. It’s also dual voltage which means it runs on both 110v and 220v. I don’t have a 220v circuit in shop big enough for this welder yet so having the ability to run it on 110v is very handy.
The Tool Wall – Two Car Garage Workshop
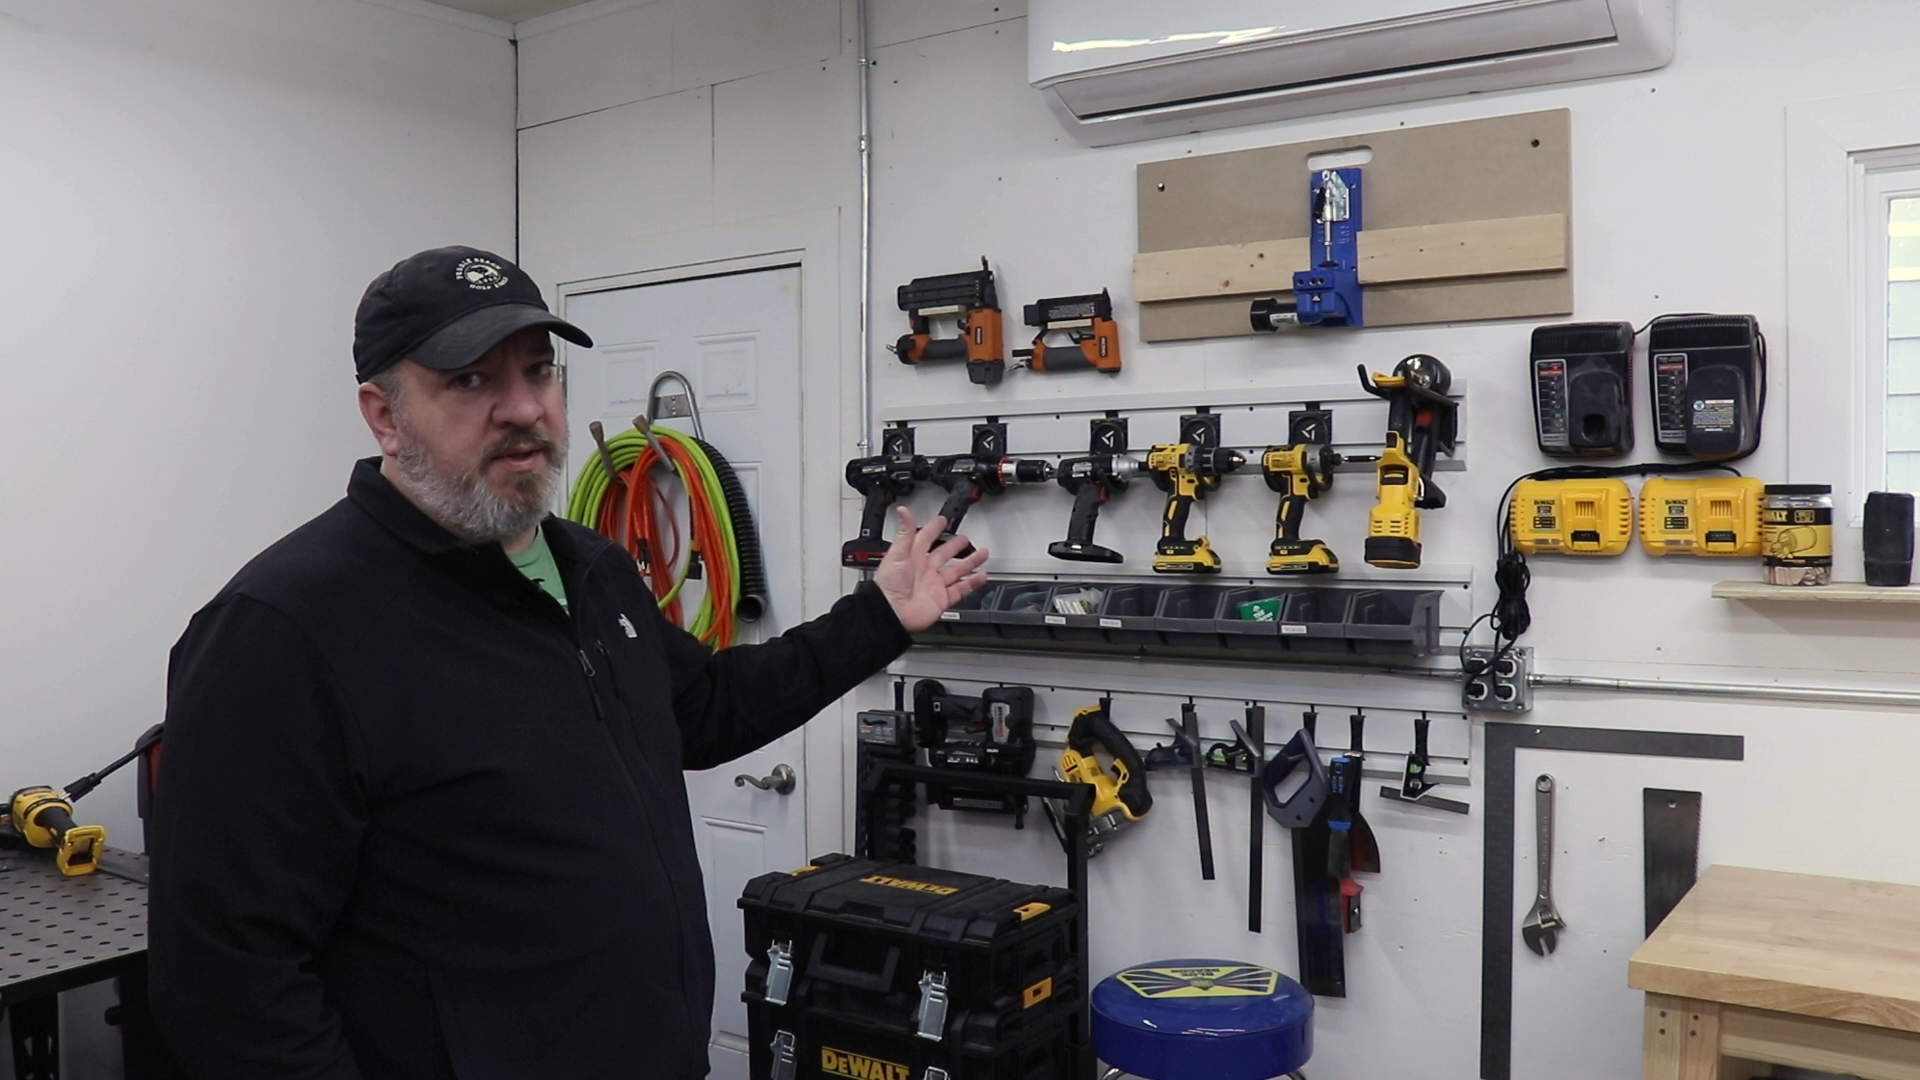
Mini Split and Tool Wall
Around the corner from the bump out is my tool wall. This is where most of my cordless tools live as well some nailers, hardware and a few other things. Most of the stuff on this wall is hung on Gladiator track (https://amzn.to/2Obhxnv). I initially got these for yard tools (rakes, shovels, etc) but converted them to this setup when I got into woodworking. They work great for the former, not so much for the latter. They’re just too big and aren’t really made for this setup. Sometime very soon I will be taking all of this down and moving all of these tools across the shop into a tool cabinet that I will be building.
Pioneer Mini Split – Two Car Garage Workshop
Above the tool wall you can see the bottom of my mini split. It’s a Pioneer (https://amzn.to/2UFHVbP) brand and I installed it about a year ago. I live in the Kansas City area so we get hot summers and cold winters (really cold winters the past couple of years). This mini split has been a great addition to my shop. It struggles in the extremes because I don’t have an insulated ceiling but it does well up to 95-100 and down to about 20. Some day I’ll insulate that ceiling and it should extend the useful range of this mini split.
Workbench and Tool Shelf – Two Car Garage Workshop

Workbench and Tool Shelf
This is the workbench I built that was originally on the bump out wall. It’s just a simple 2×4 workbench with a cheapo butcher block top from Sears. That top was only $100 and it’s actually held up extremely well! This bench is usually covered in various crap but I cleaned up a bit before filming this episode. Above the bench is just a little plywood shelf that I pocked holed to the wall. It holds my biscuits, batteries, Ron Swanson, my sander, a mallet and some hand planes. Below the bench is some storage where I keep some older tools, some camera equipment and my DeWalt biscuit joiner (https://amzn.to/2T9Oamp) and track saw (https://amzn.to/2TeTLbg).
DeWalt 735 Planer
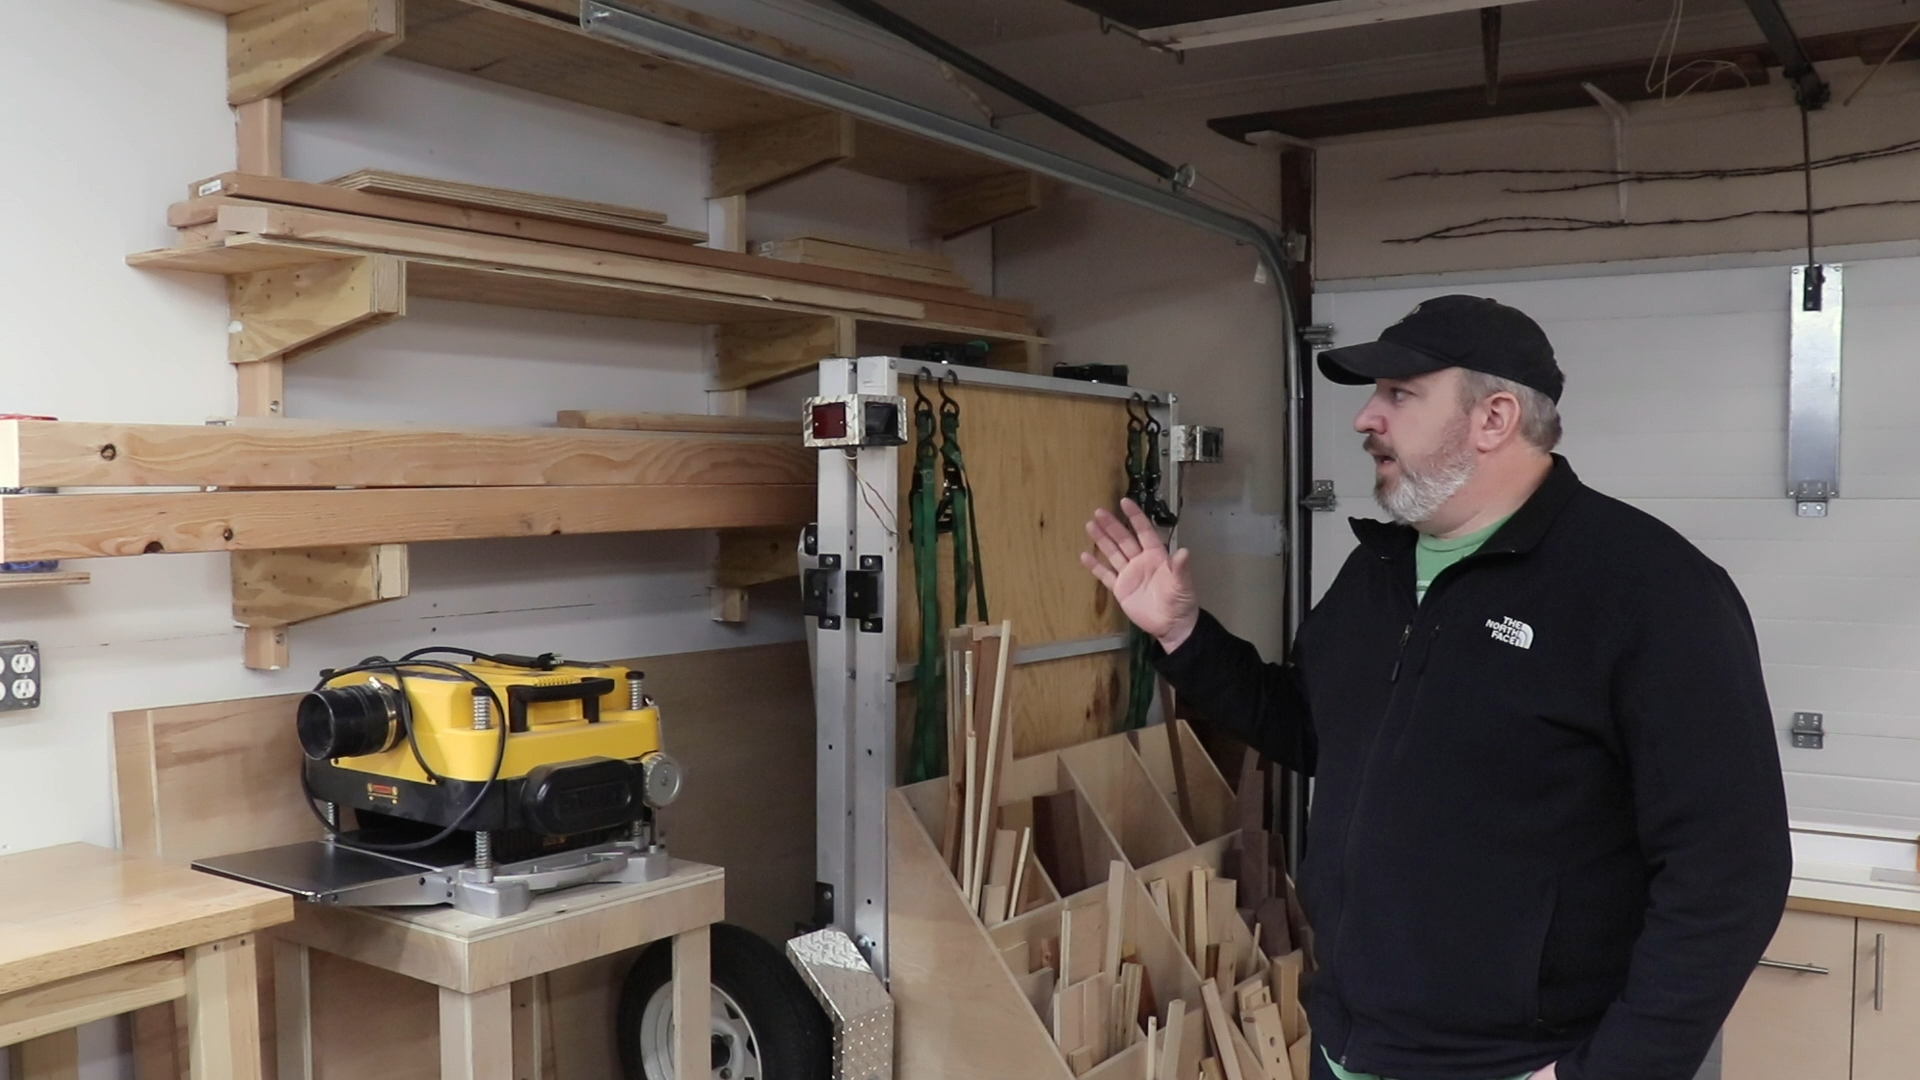
Planer, Lumber Rack and Trailer
My planer is the DeWalt 735 (https://amzn.to/2O9nuBy). As mentioned previously, I was able to get this used with my dust collector. The DeWalt 735 is generally considered the best lunchbox planer on the market. It’s done really well for me. The only time I’ll replace it is when I have the funds and space to get a 20″ planer.
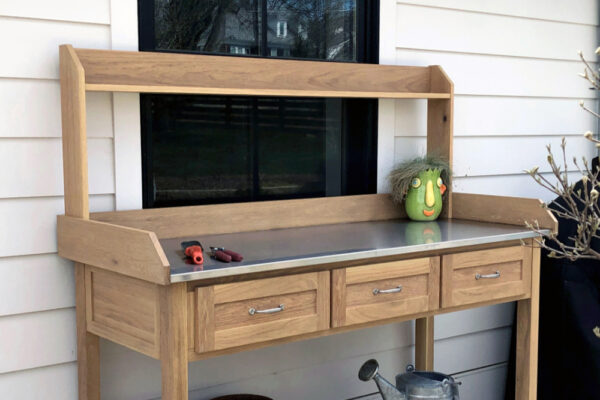
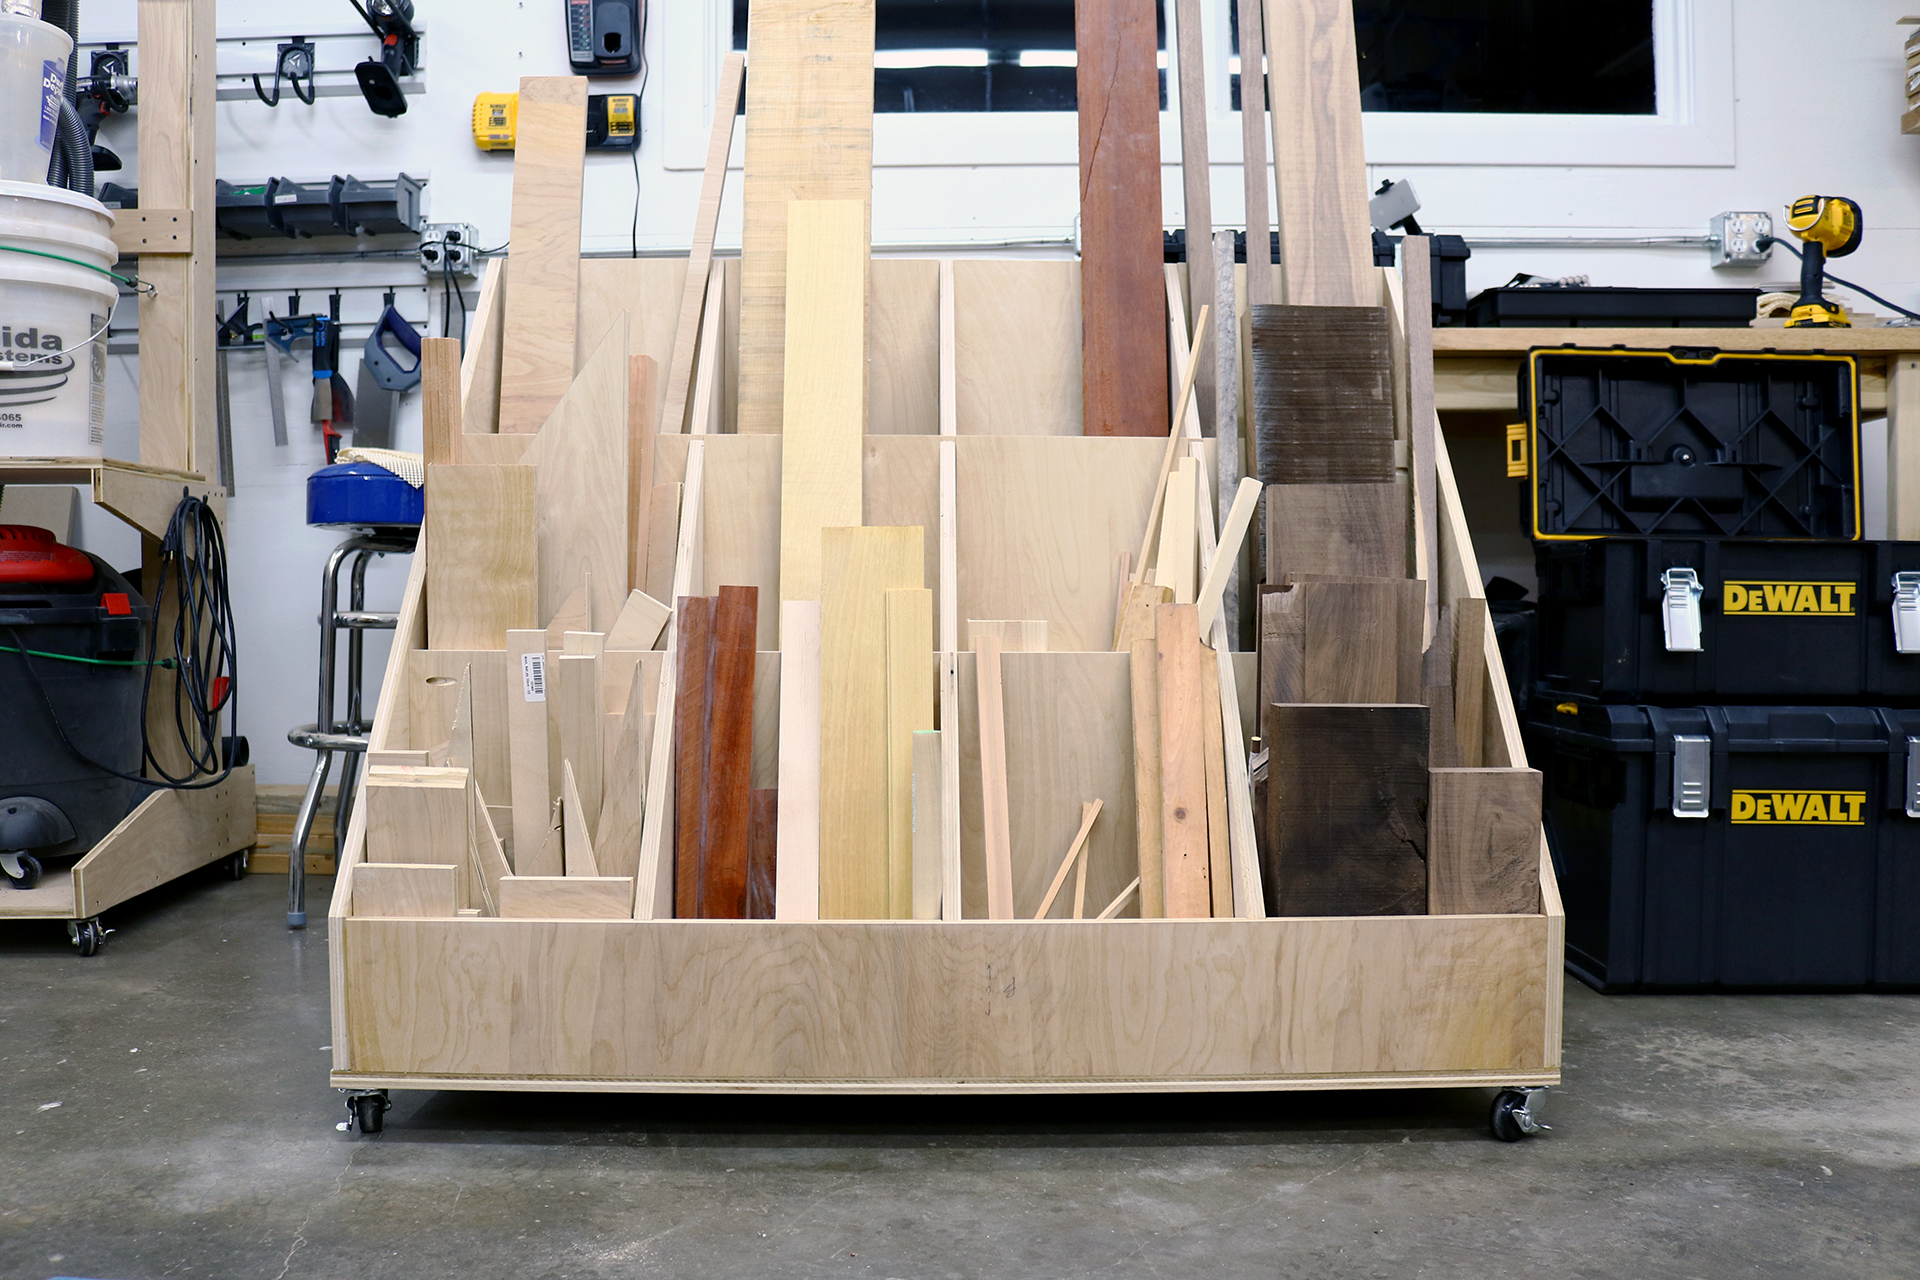
Scrap Wood Storage Cart
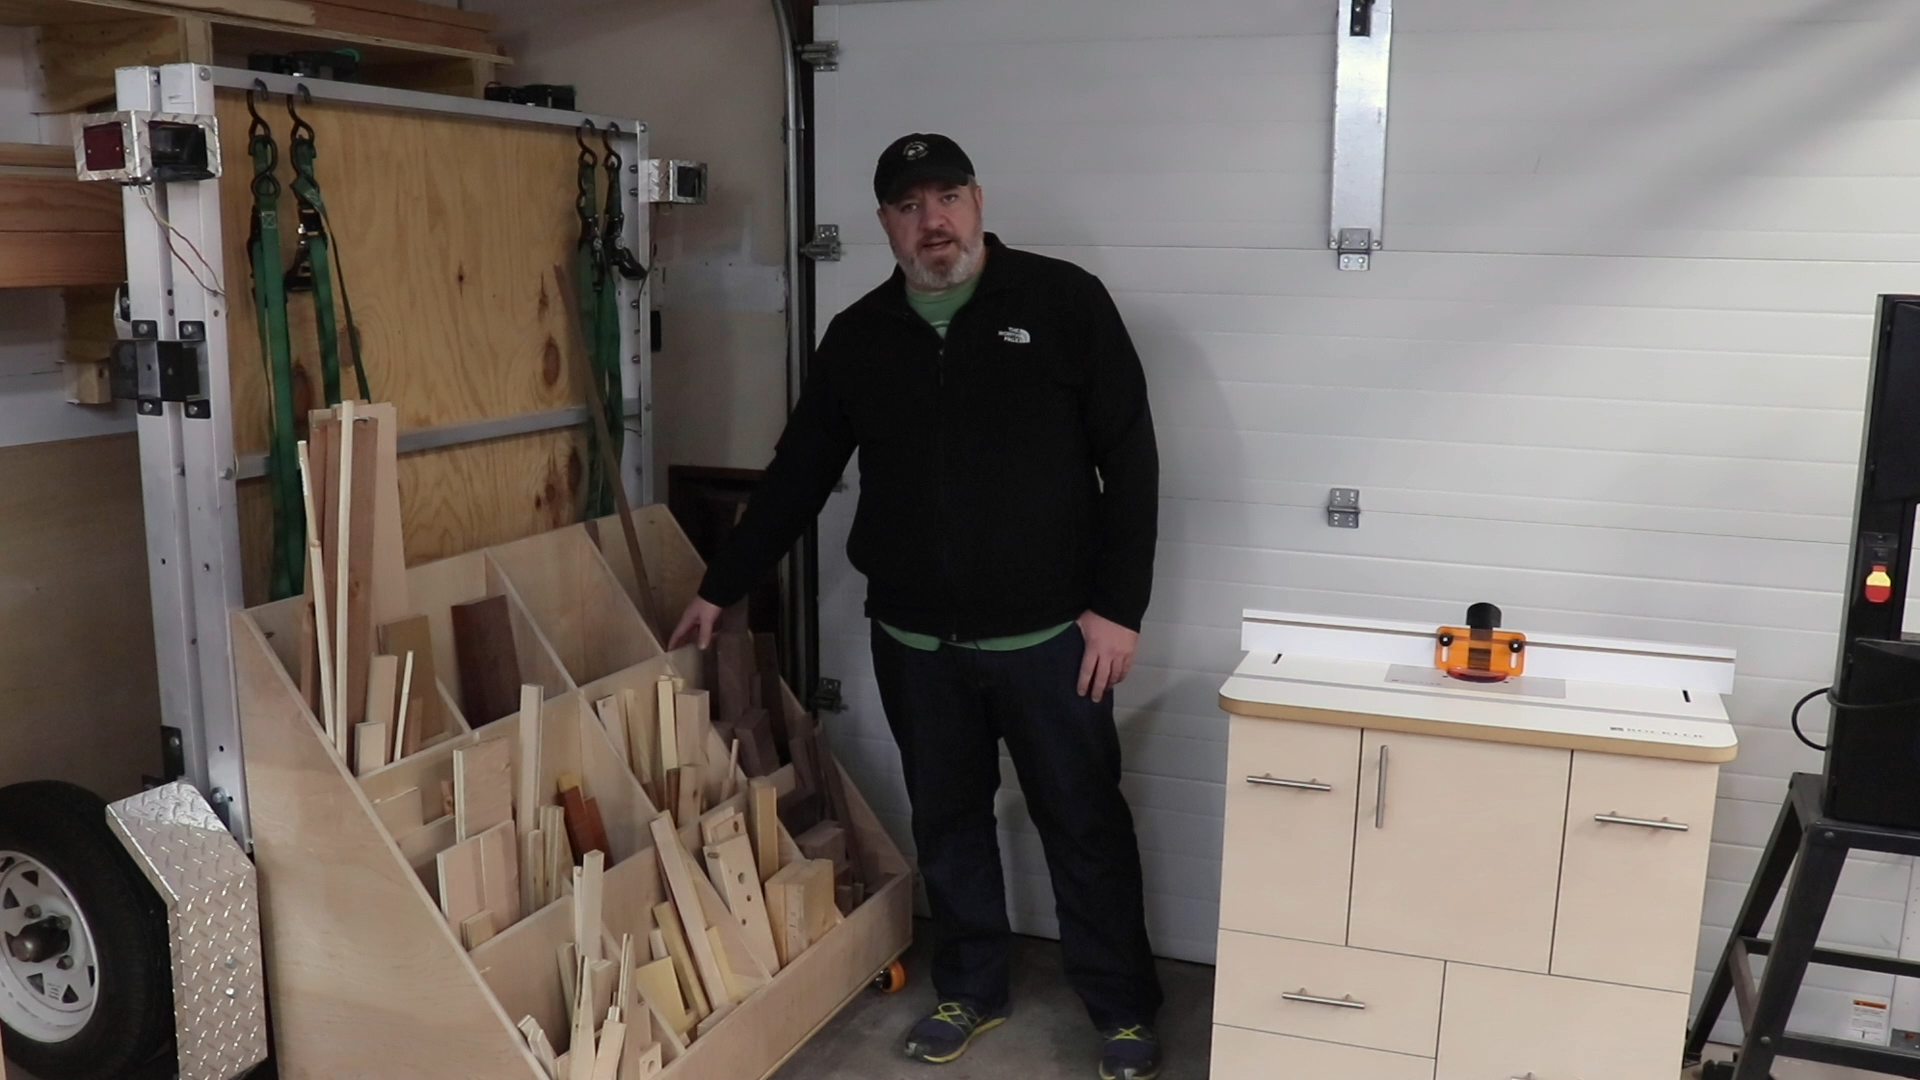
Scrap Wood Storage, Fold Up Trailer and Router Table
To the right of the planer is my scrap wood storage cart. It’s a 2′ x 4′ mobile cart for storing all of my scrap wood. I built this last summer and it’s been really handy. All of the scraps are easily accessible and it can move around the shop easily as needed.
Fold Up Trailer
Behind my scrap wood cart is my fold up trailer. This thing has been a god send. I drive an SUV and don’t have room for a full size trailer which makes lumber runs a bit challenging. Enter the Strong Way aluminium fold up trailer. It’s 4′ x 8′ so it can handle a full sheet of plywood and it folds up quite compact for easy storage in the corner of my shop. The trailer only takes about 5 minutes to fold down and fold up. If you’re in a similar situation to me, I highly recommend one of these trailers.
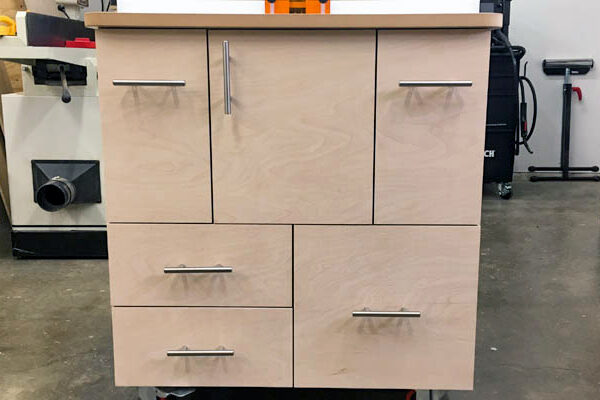
Router Table and Cabinet
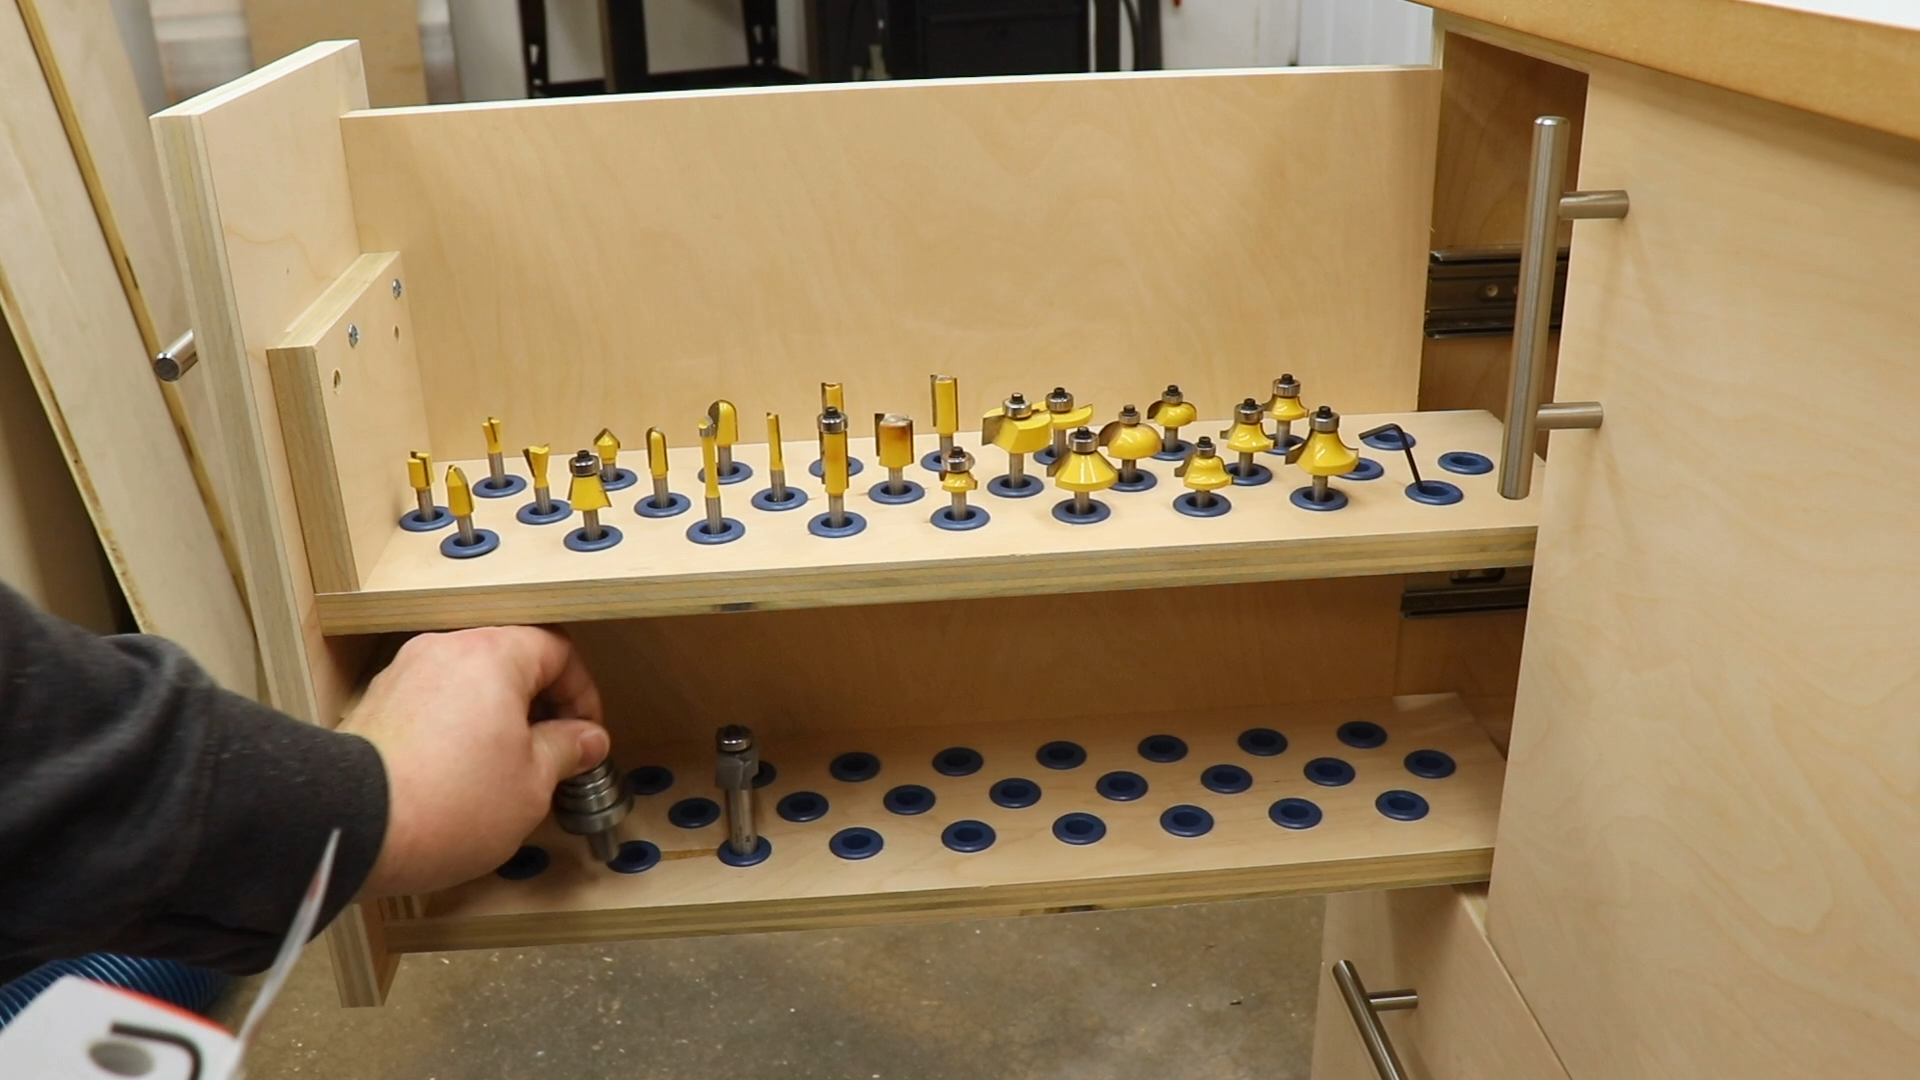
Router Table Cabinet Storage
To the right of the scrap wood cart is my router table and cabinet. I just built this and it’s been a great addition to the shop. It can store all of my bits, accessories and routers and has integrated dust collection. I used a Rockler router table for the top.
WEN 10″ Bandsaw
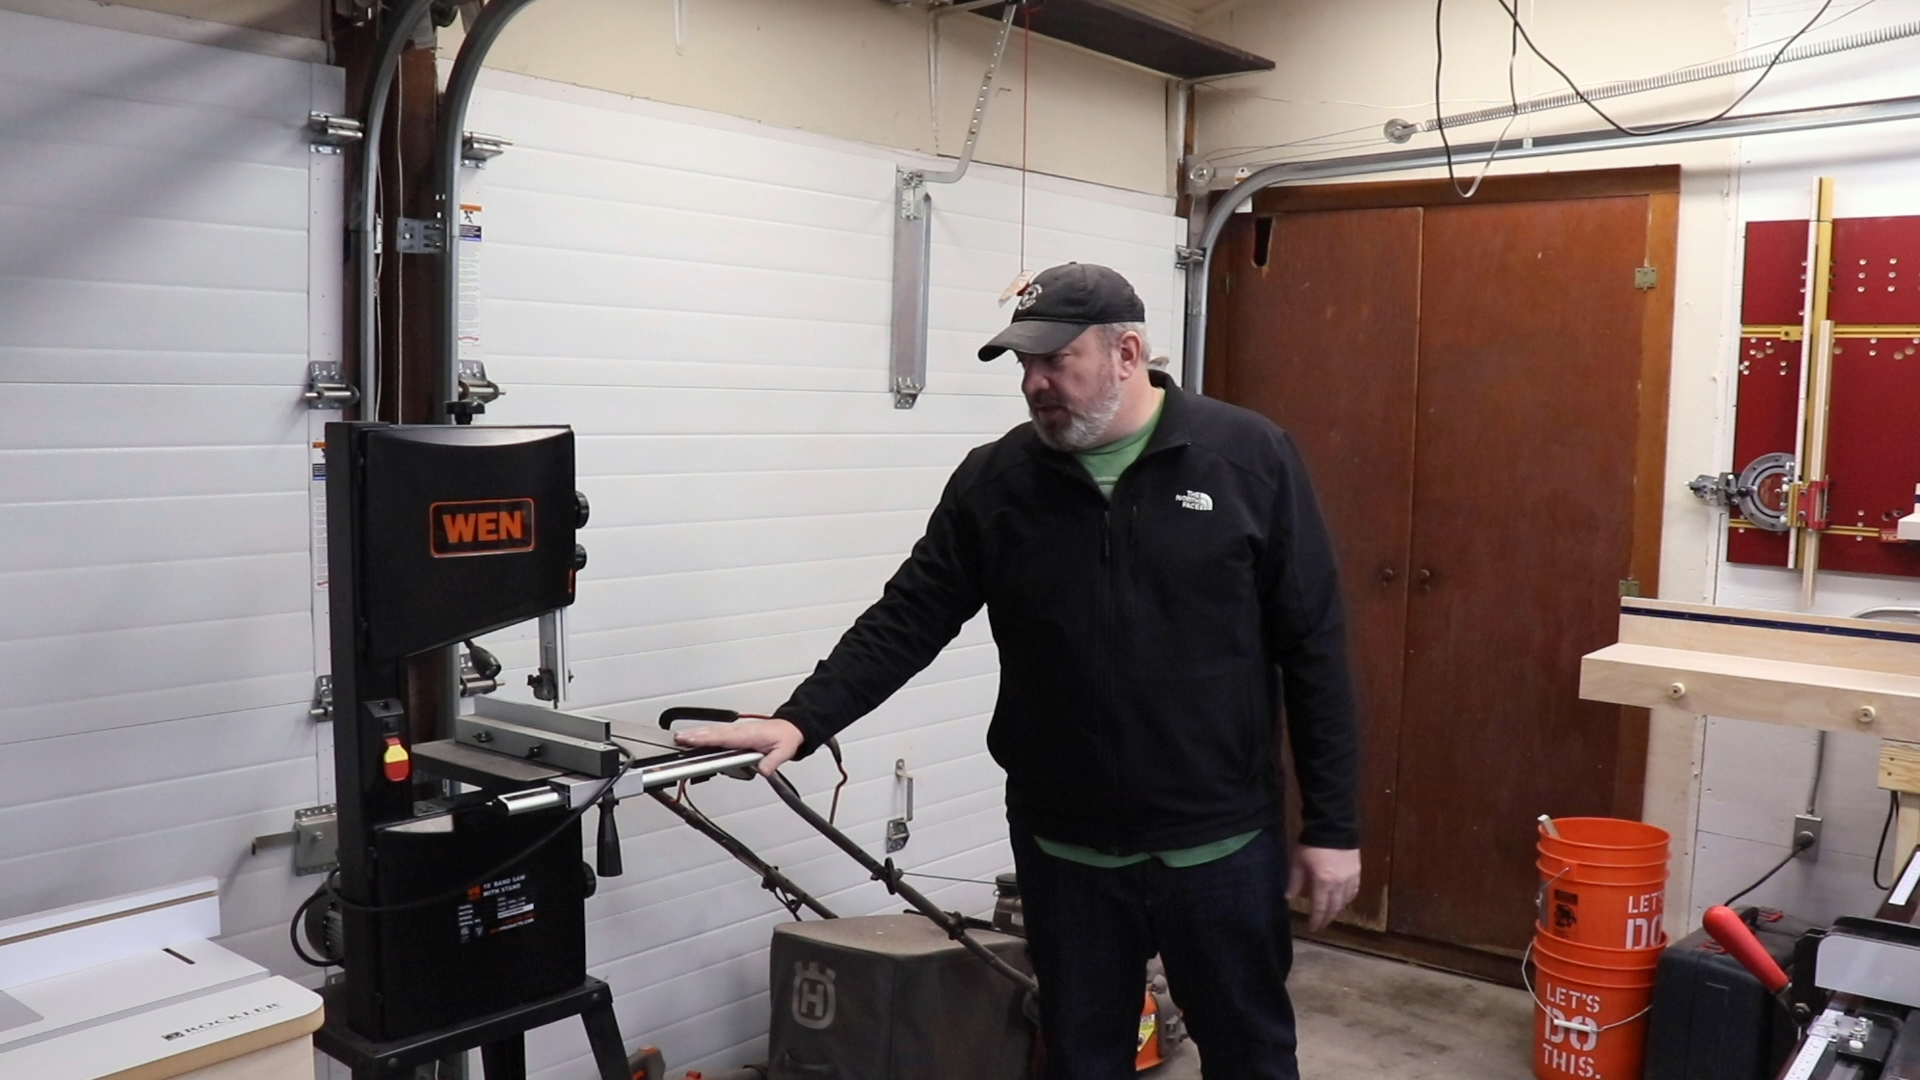
WEN 3962 10-Inch Two-Speed Band Saw
My band saw is a WEN 10″ band saw (https://amzn.to/2HDvAB4). When I first got this band saw I really did not care for it at all. I could not get it to cut without serious blade drift. I tried the Alex Snodgrass setup method and I just could not get it to cut well. Then I got a new blade. Presto! It cuts well. This band saw comes with either a 1/4″ or 3/8″ blade and it’s just pure trash. I replaced it with a Woodslicer from Highland Woodworking and it works great now. There are obviously bigger and better band saws out there but for a 10″ band saw it does what I need it to do and does it well.
Miter Saw Station – Two Car Garage Workshop
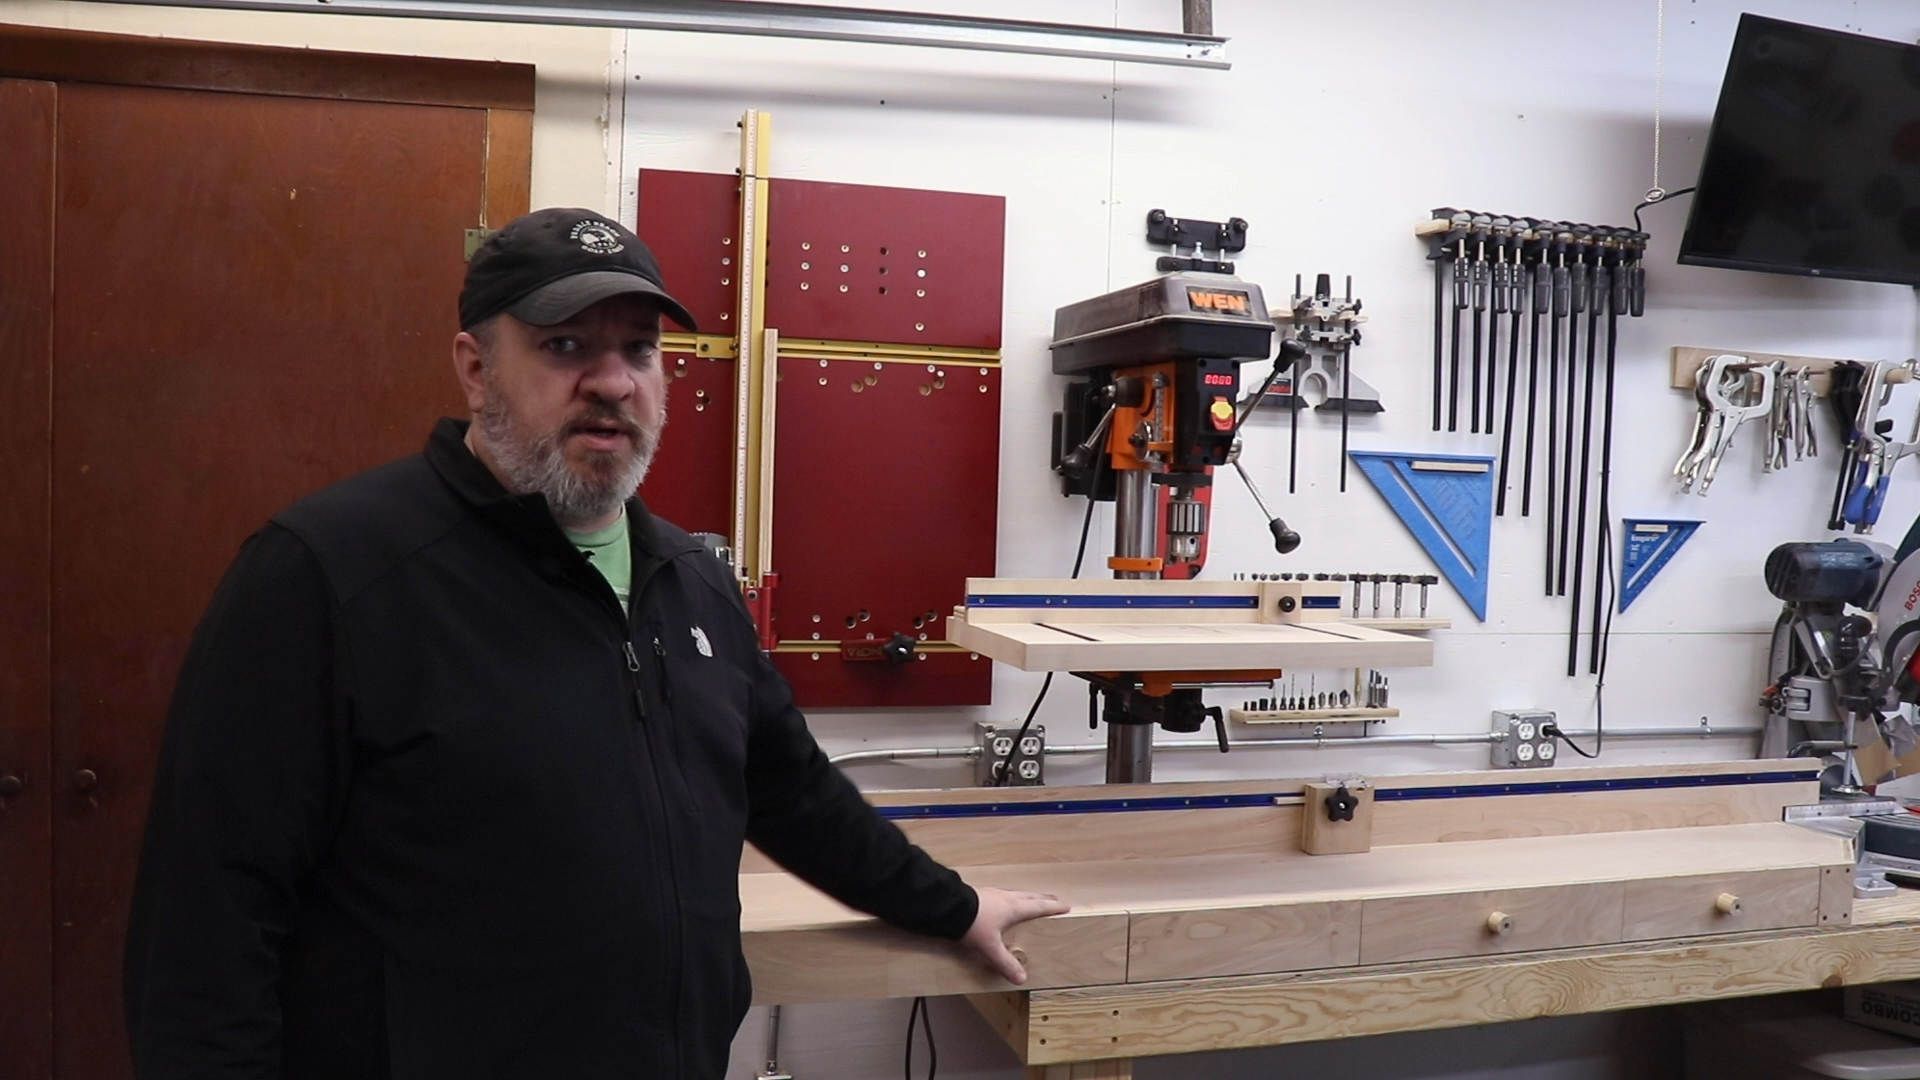
Miter Saw Station
Around the corner from my band saw is my miter saw station. I built this to be a temporary solution but it’s been well over a year and has held up well. I just threw it together one night and when I was about to cover the front I realized I had spots for four drawers. Being sorely lacking storage, I threw together some quick drawers (all different sizes). It has ruler and stop block so I can get accurate, repeatable cuts. I am not sure how much longer this will live as I have plans for a large miter saw station on the opposite wall.
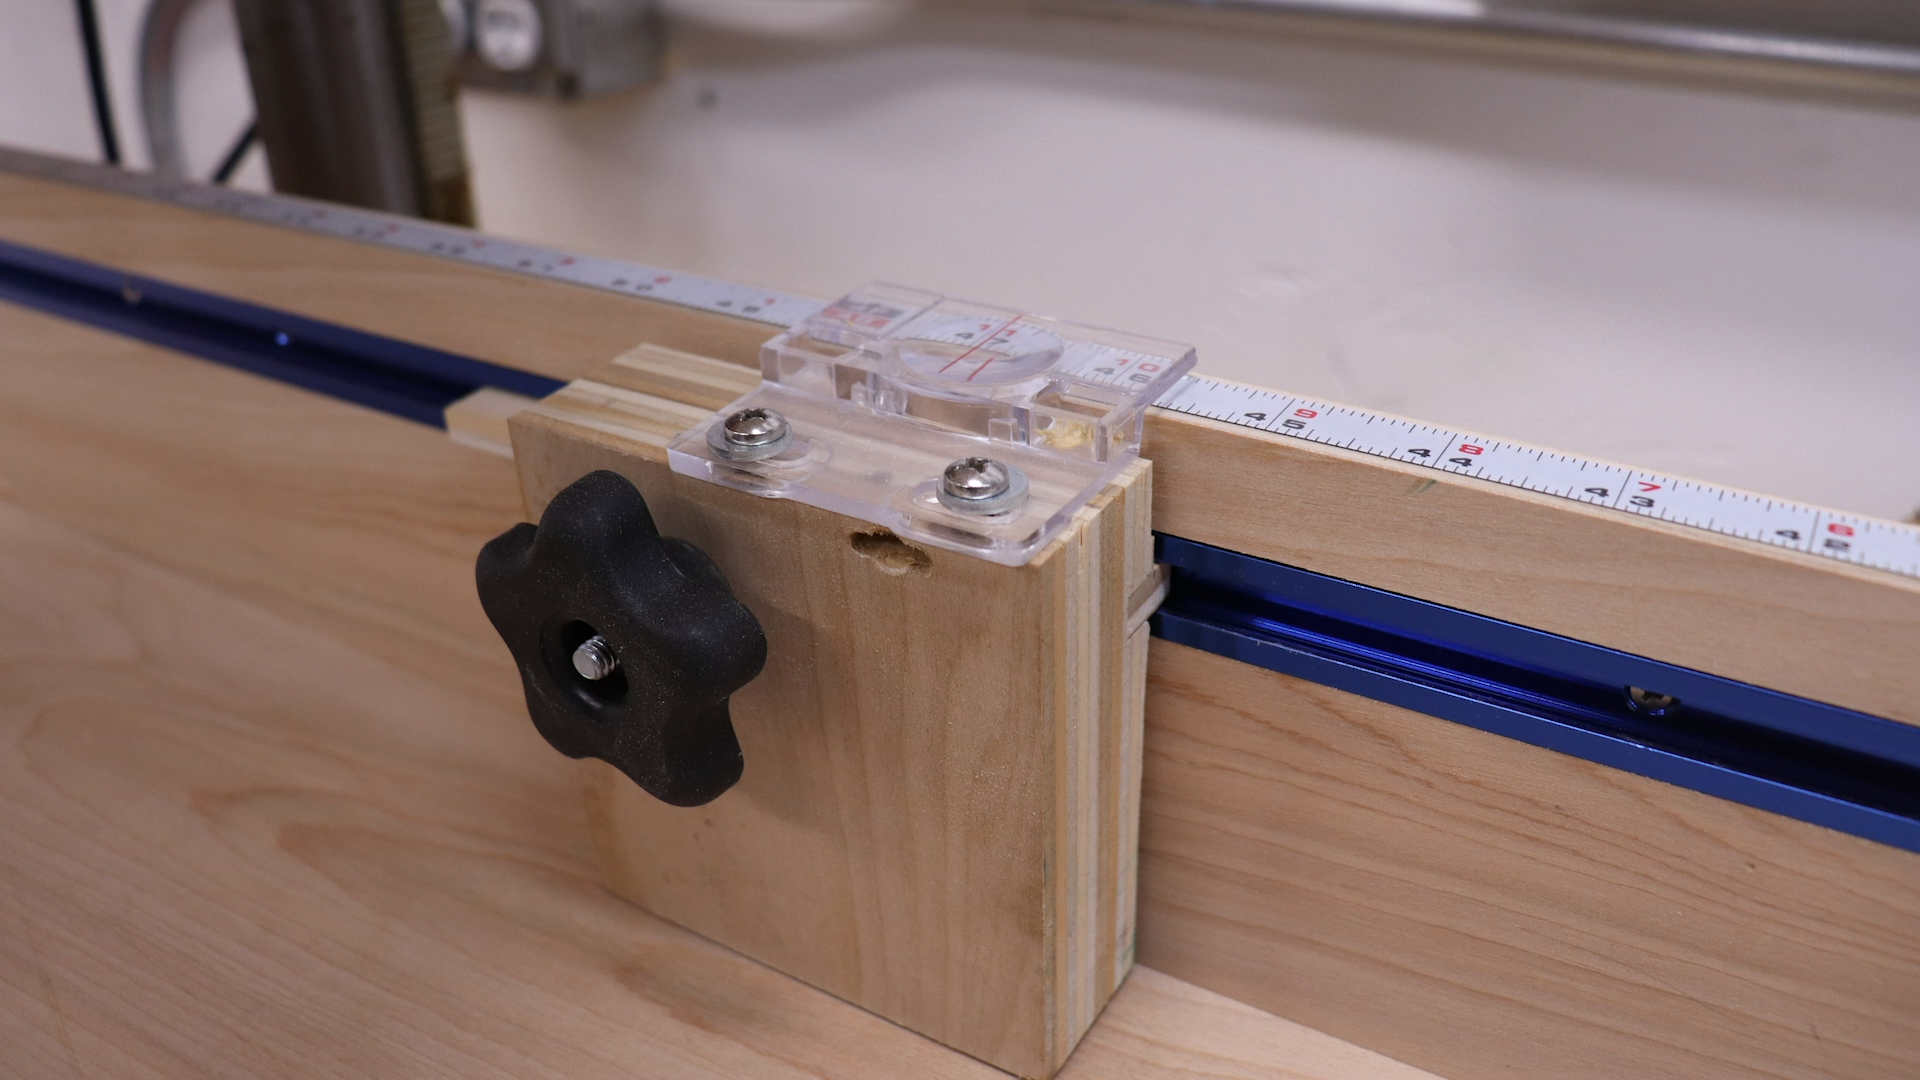
Stop Block
WEN 12″ Drill Press
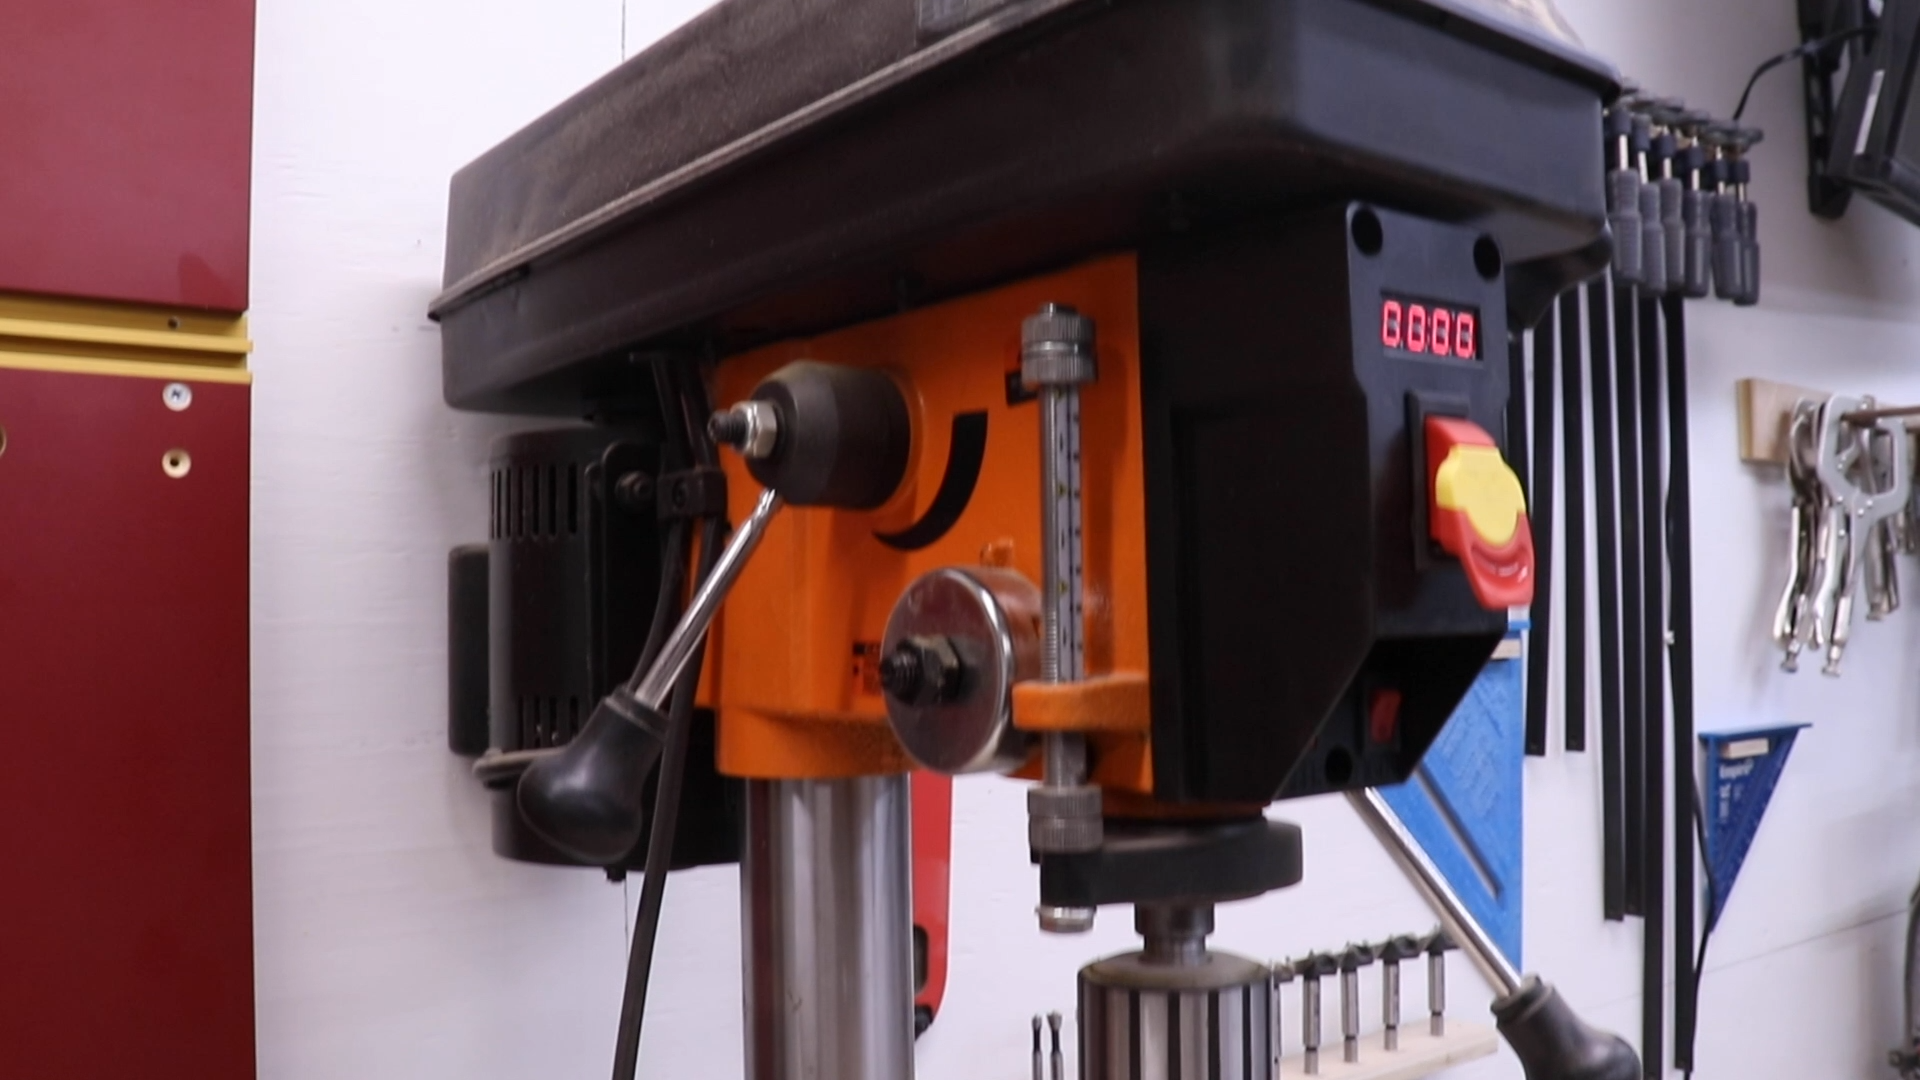
WEN 4214 12-Inch Variable Speed Drill Press
Behind the miter saw station is my WEN 12″ drill press (https://amzn.to/2Y2wTPU). It is a variable speed drill press so no fussing with belts to change the speed. Just pull that little handle to speed it up and it has a digital readout for the RPMs. This drill press has performed really for me. It was cheap but I have no complaints.
Drill Press Table
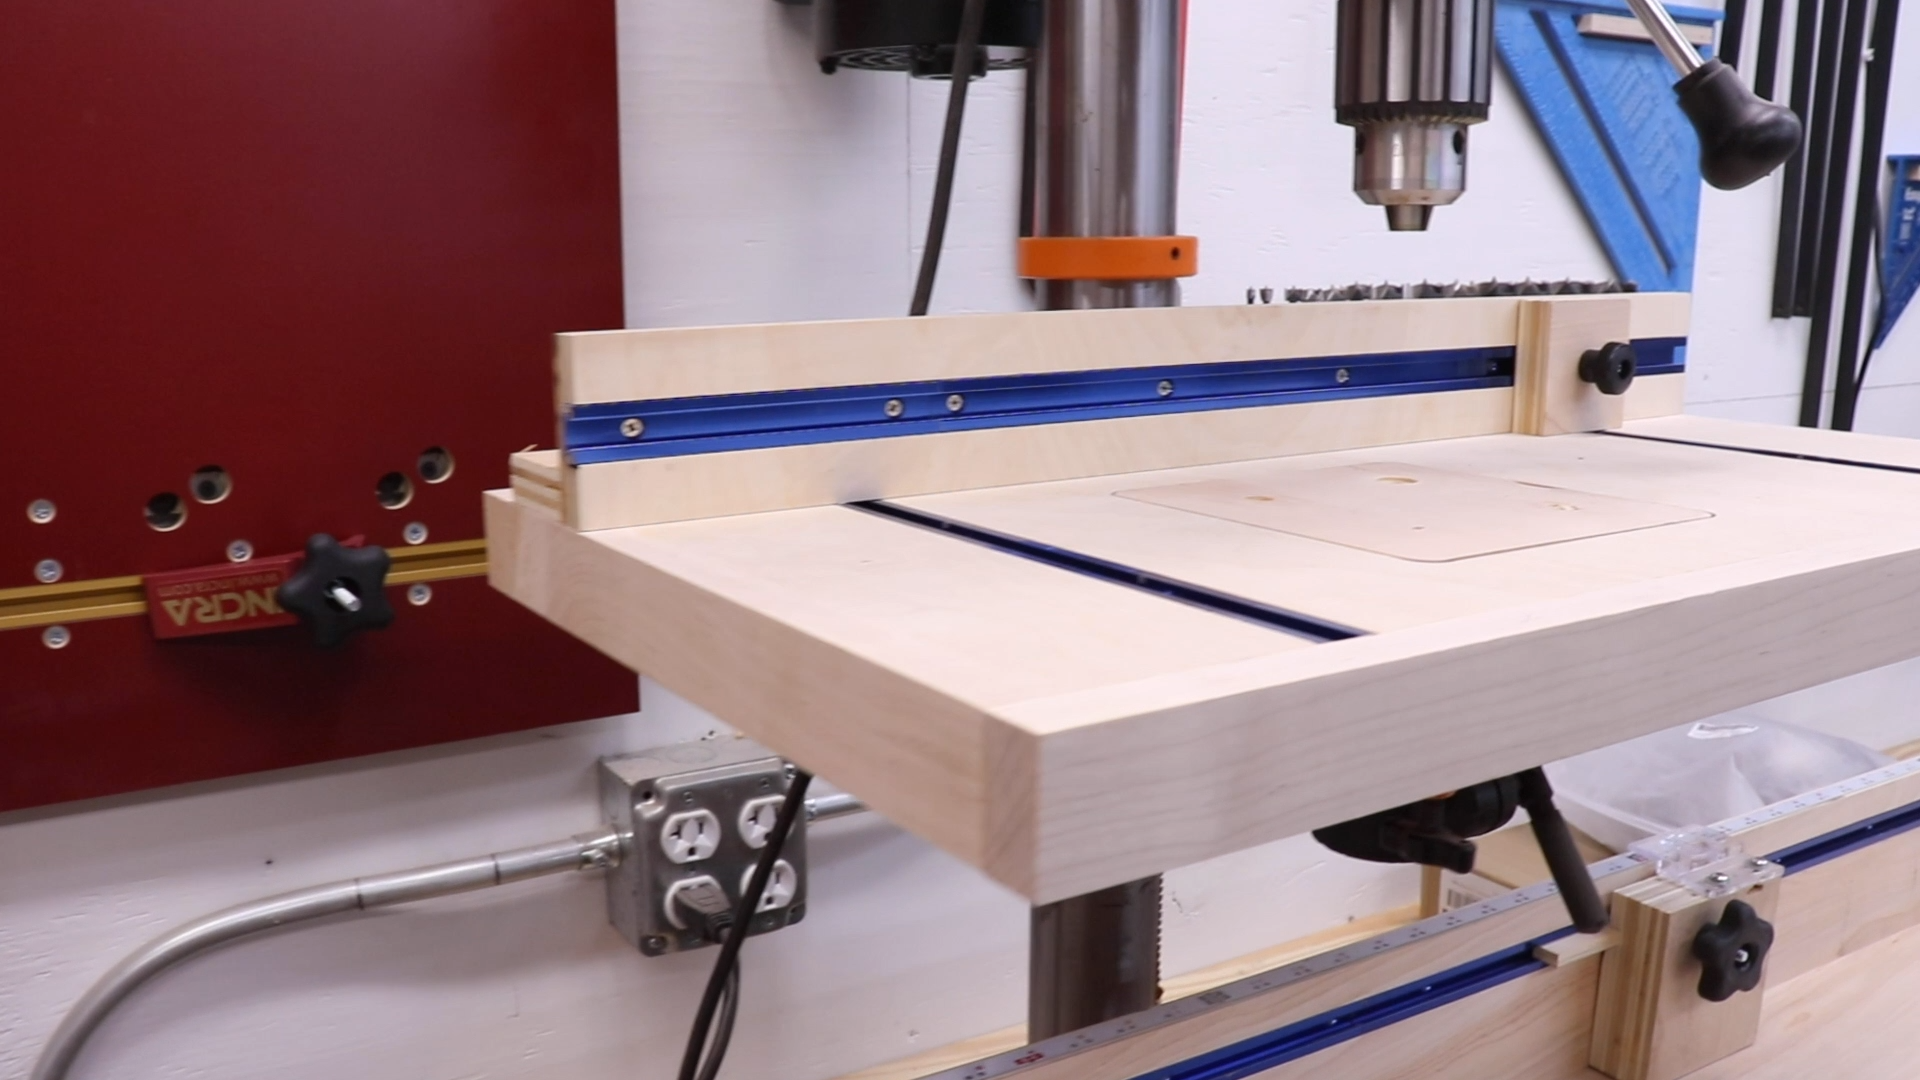
Drill Press Table
Attached to my drill press is the drill press table that I made. A drill press table really takes a drill press to the next level for woodworking. I have a stop block for repeatable drillings and a replaceable insert for zero clearance drilling. If you don’t have a table on your drill press, check out my build here: How To Build a Simple Drill Press Table
Incra Miter 5000

Incra Miter 5000
The Incra Miter 5000 (https://amzn.to/2TIv0cz) is BAD ASS. I love this thing. Rockler was running a special last summer for about $100 off and I jumped on that deal. I had previously used a homemade miter sled but this thing is just so much more precise. The stop block has a somewhere around a 60″ capacity and the can be moved in 1/32″ increments. The angle can be set in half degree increments. It’s really an amazingly well made product. I highly recommend it to anyone looking for a miter sled.
Bosch Glide 12″ Sliding Compound Miter Saw
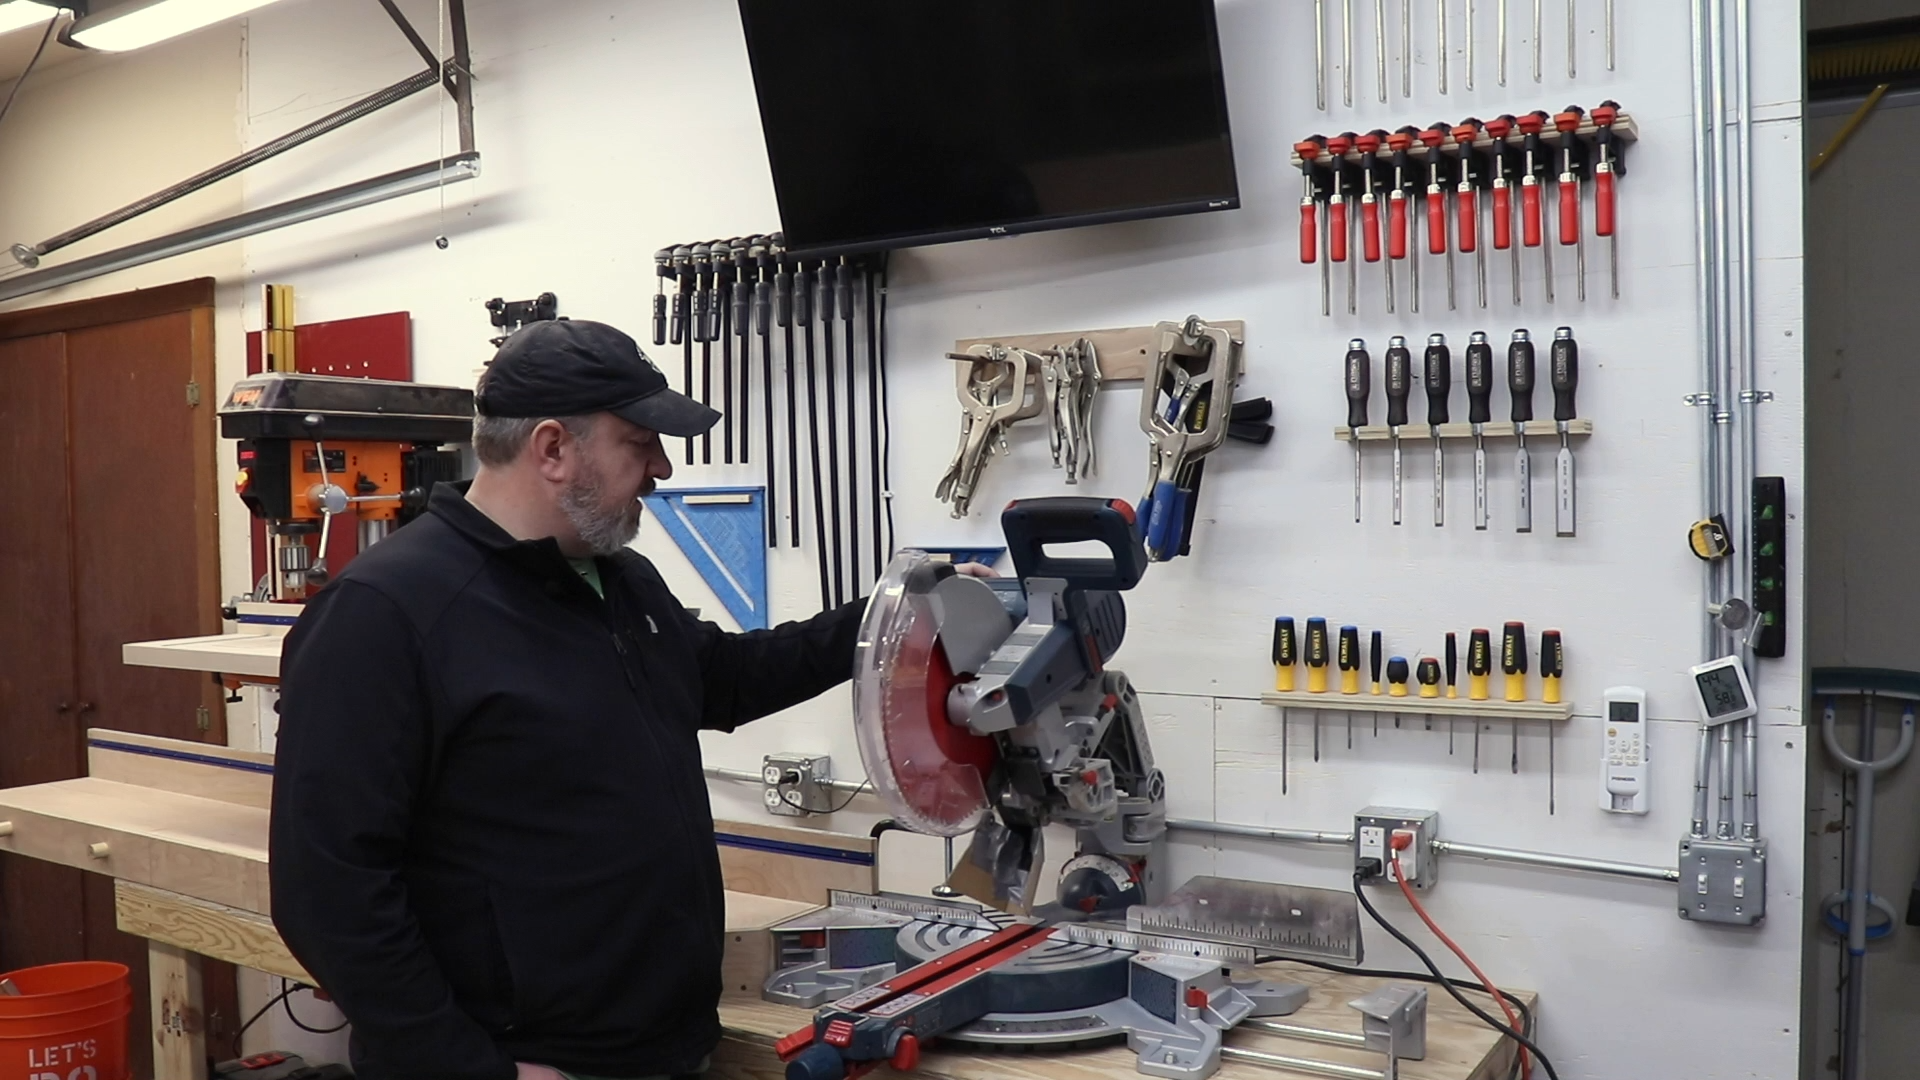
Bosch Glide 12 Miter Saw
On the other end of my miter saw station is my miter saw. It’s the Bosch Glide 12″ (https://amzn.to/2UFuOaD). I love this saw. Mainly because it takes up so little space. The articulating arms replace the big slides that stick out the back of most sliding miter saws. I believe this saw takes up 12-18″ less room than other 12″ sliding miter saws which is very helpful in a small shop.
However, the dust collection is TERRIBLE. You can see little homemade dust shoot I made but it doesn’t really help. When I build my permanent miter saw station this will get completely enclosed so hopefully the dust collection isn’t as big of an issue. Overall, I love the saw. I know that miter saws are the worst offenders in the shop for dust collection but this one is way worse than I thought it would be based on my research.
Let’s Talk About Clamps
Behind the miter saw is more tools. Chisels, screwdrivers, squares, clamps, drill bits, and router guides all live on this wall along with my TV which I installed last summer. The F-style clamps are an assortment of Bessey and Harbor Freight. The Besseys are awesome. They are some of my favorite clamps. The Harbor Freights are just not close to the quality of the Besseys. They flex way too much so you cant get as much pressure. If you’re only going to use the smaller Harbor Freight F-style clamps, those are okay. Anything bigger than 6-12 inches just aren’t worth the money in my opinion. The Besseys are only a few bucks more and go on sale quite often at the home depot.
Home Base – Two Car Garage Workshop
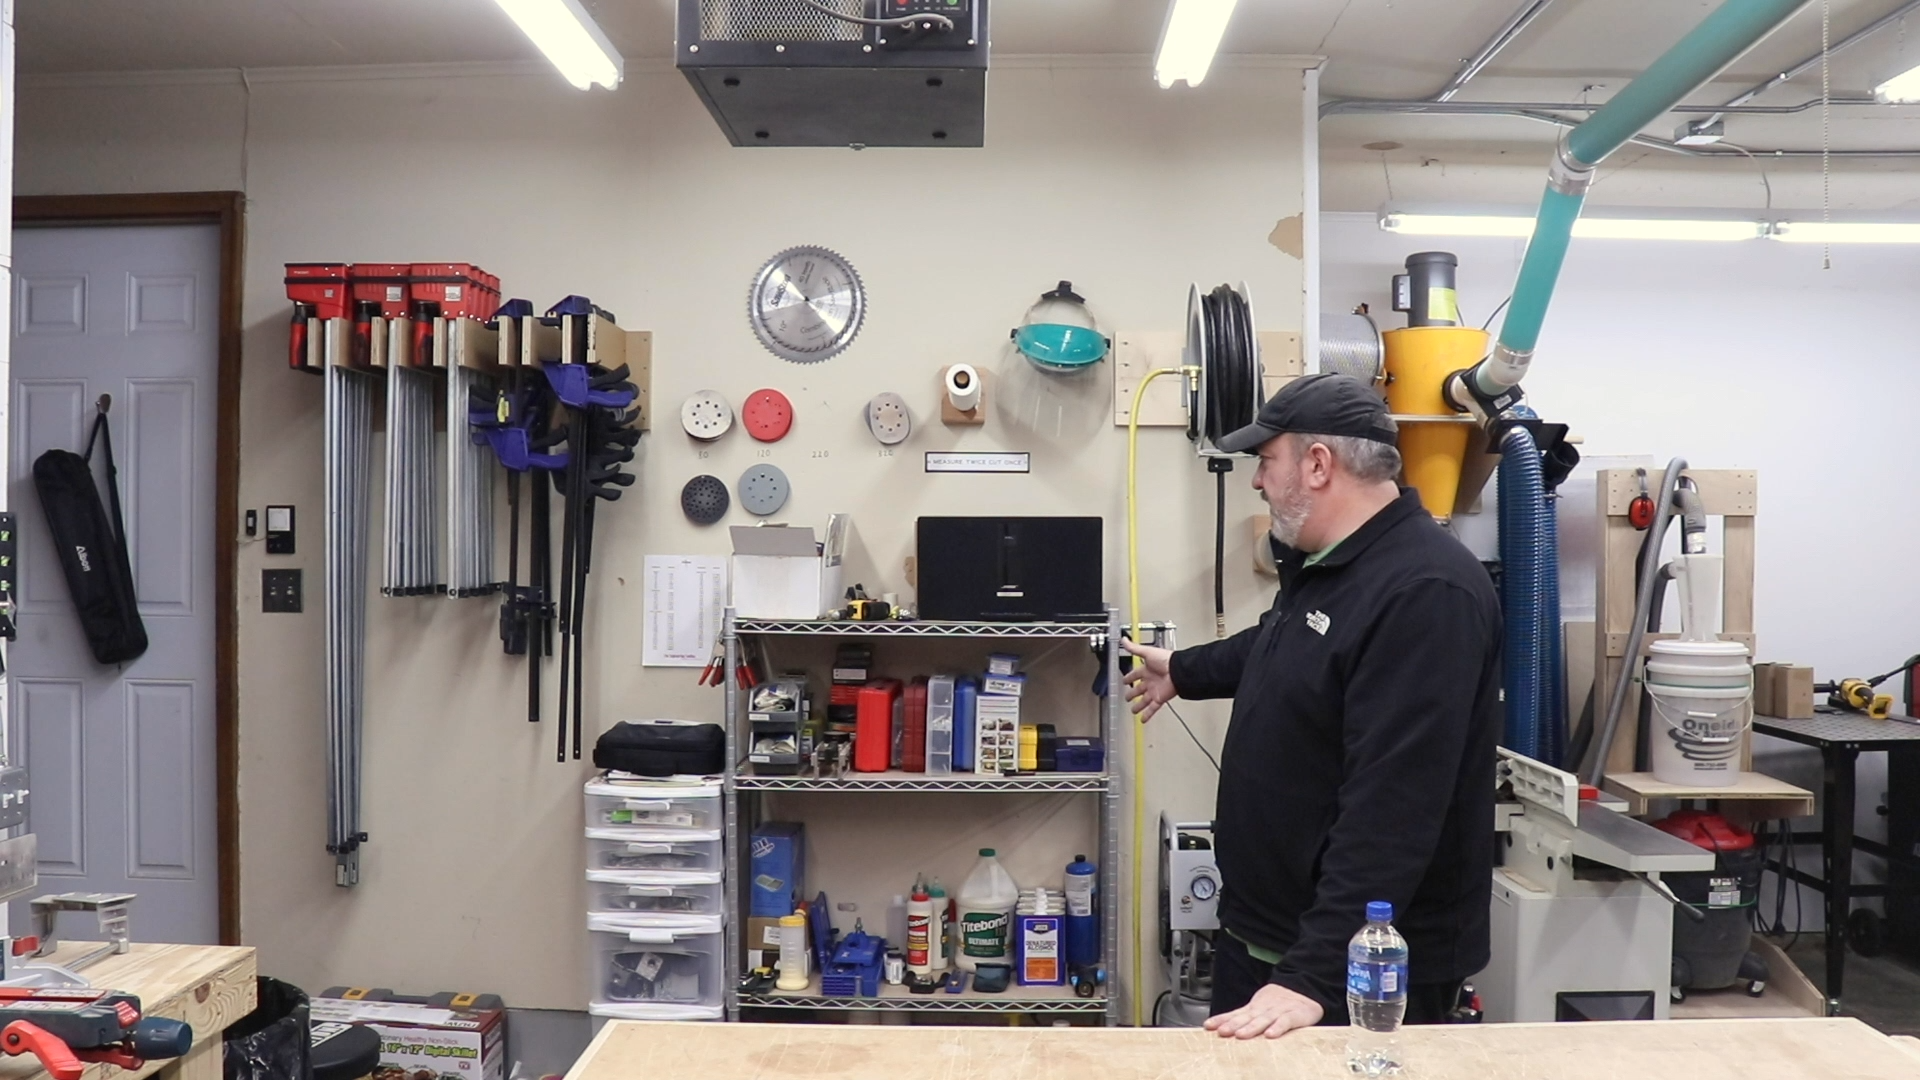
Main Wall
In this picture above, I am standing where I spend probably 95% of the time in my shop. On that wall is a storage rack that holds all kinds of stuff; glue, jigs, paint, drill bits, Kreg stuff, etc. This will be getting replaced very, very soon with a new set of base and upper cabinets with a cordless tool charging station. Stay tuned for that.
On the left is my clamp rack for my larger clamps. Most are Bessey K Body Revo (https://amzn.to/2Y0gDPk) parallel clamps which are really good clamps. The other clamps are quick clamps. A few of them are Irwin which I really like and the rest are Harbor Freight and they are pure trash. They provide almost no clamping pressure. Not surprising, they cost about $5 a piece but I can crank down one of those clamps on my finger and it doesn’t even hurt. I’ll be getting rid of those soon.
California Air Tools 10 Gallon Air Compressor
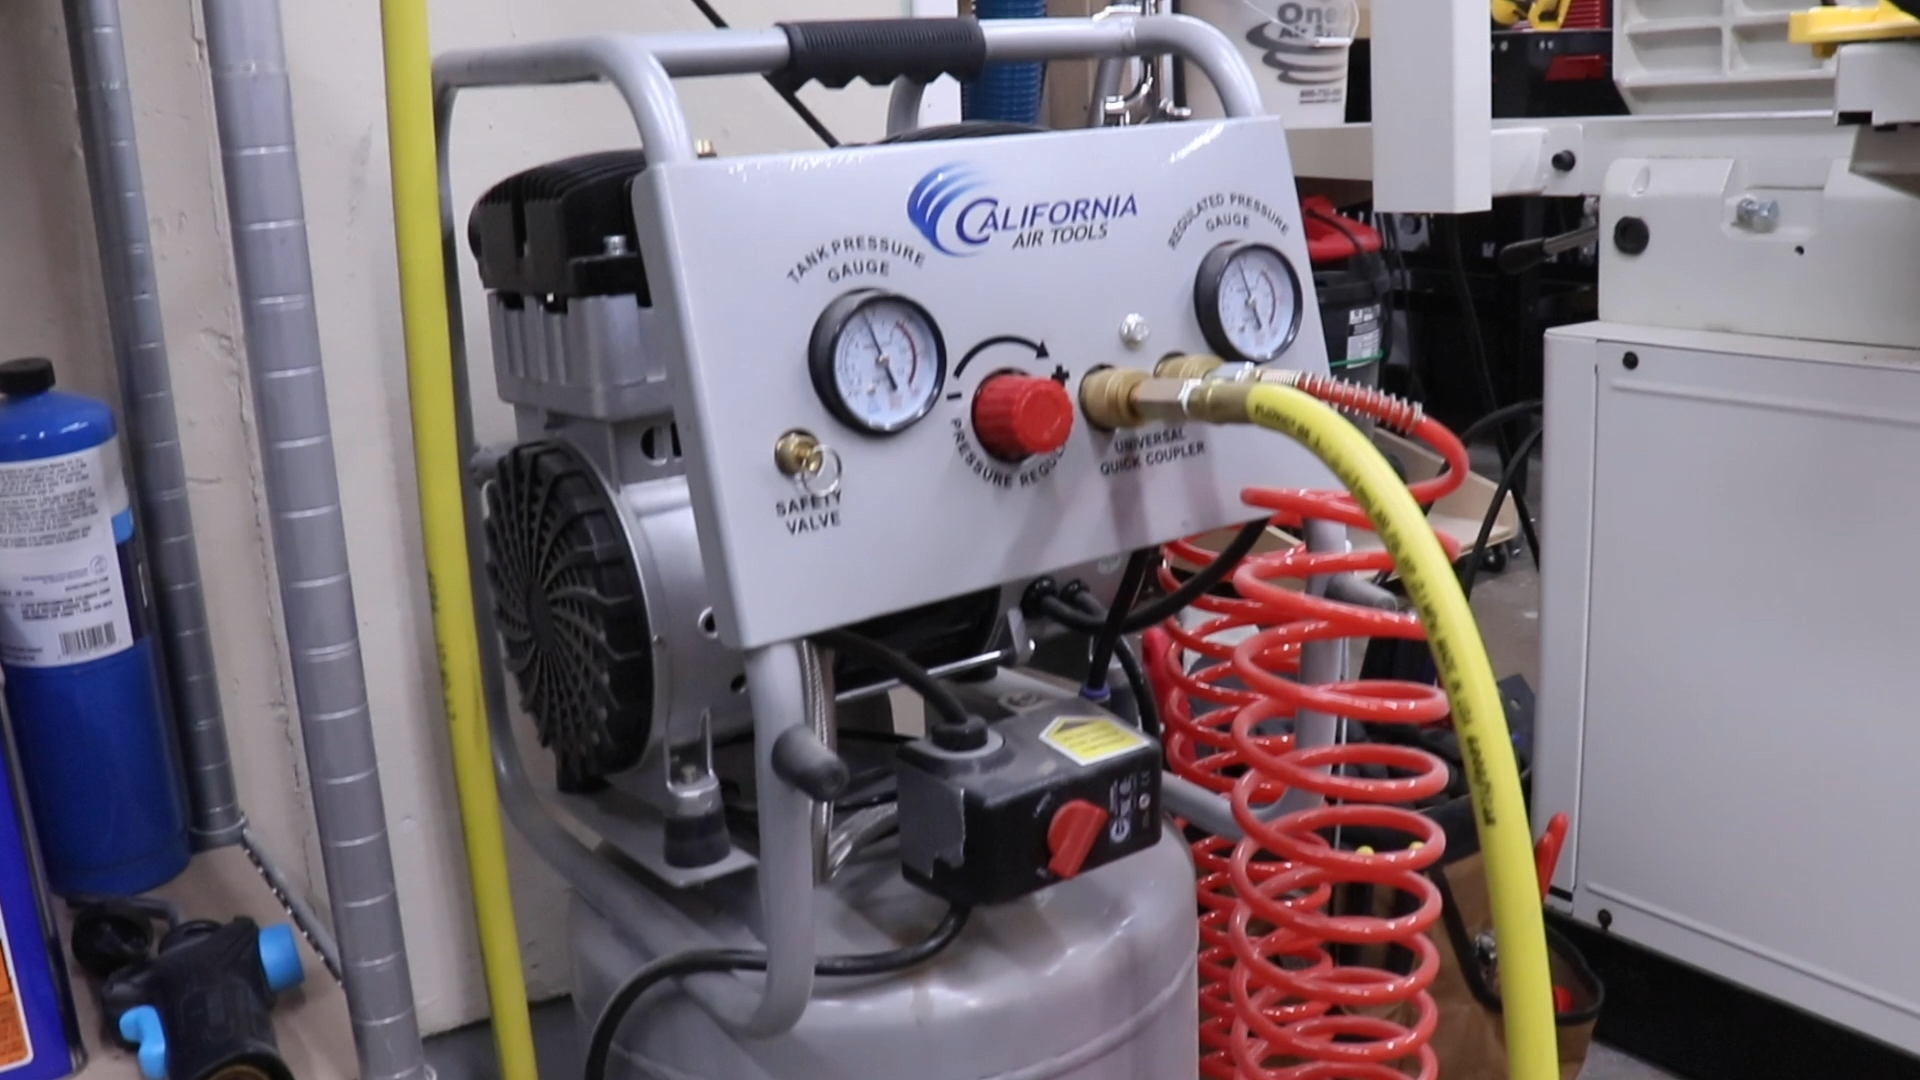
California Air Tools 10020C-22050
Also on that wall is my air compressor which is a California Air Tools (https://amzn.to/2Y1X7lo) 10 gallon compressor. This thing is really quiet. I believe they are the quietest compressors on the market but don’t quote me on that. You can stand right next to this when it’s running and easily carry on a conversation. If noise is a concern for you, I highly recommend California Air Tools.
Sanders
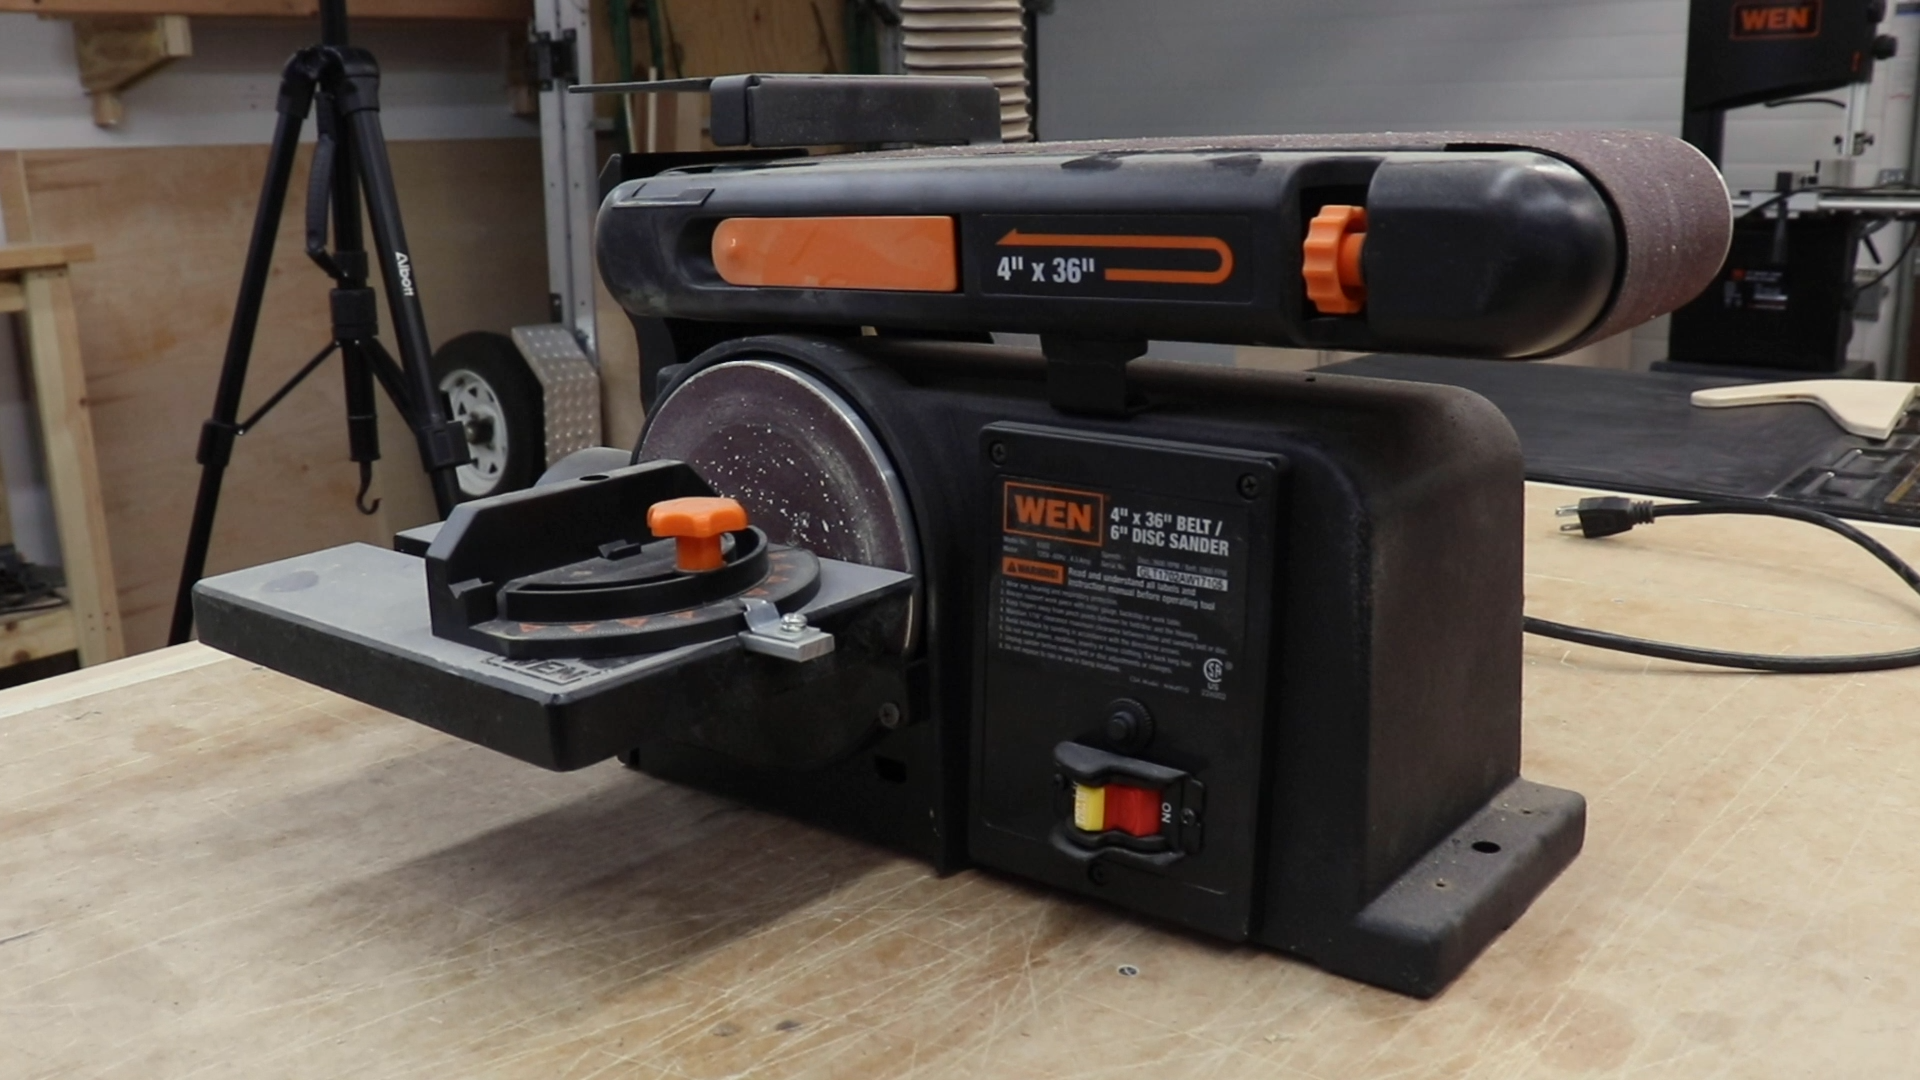
WEN 6502T 4.3-Amp 4 x 36 in. Belt and 6 in. Disc Sander with Cast Iron Base

WEN 6510T 3.5 Amp Oscillating Spindle Sander
Below my assembly table I store my stationary sanders. Both are WEN. One is a 4×36 combination belt and disc sander (https://amzn.to/2TJl7LT) and the other is an oscillating spindle sander. Both perform admirably but they are just really small. In hindsight I would have gotten the Ridgid oscillating belt sander (https://amzn.to/2Fh6hTH). It has more capacity than either of these machines but overall takes up a smaller footprint because it takes the place of both machines.
Assembly/Outfeed Table
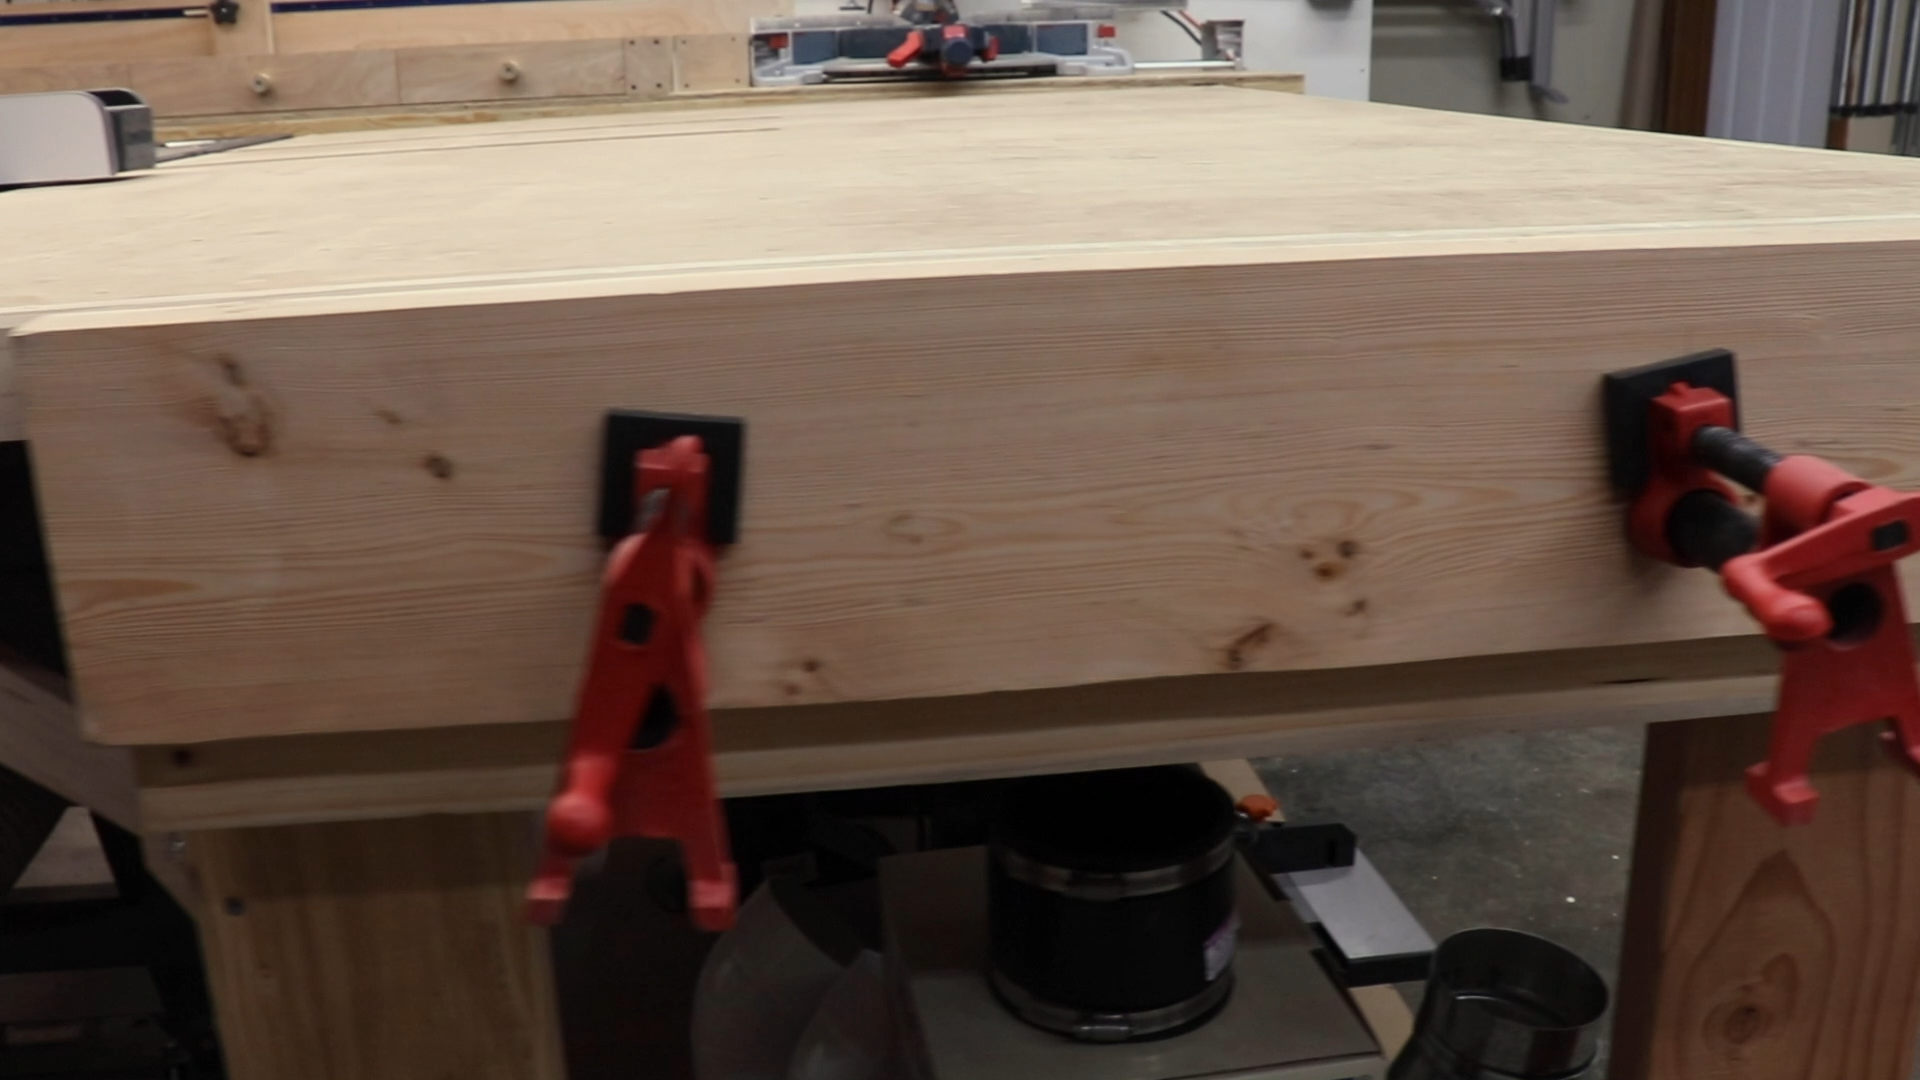
Assembly Table Vise
The first project I filmed for my YouTube channel was my assembly/outfeed table. This table has been an awesome addition to my shop. It doesn’t have all the features of some of those fancy assembly tables out there but it gives me a nice, flat surface to work on. I recently added a vise using two pipe clamps to the side of the table and that has proven very useful. At some point I will be making some upgrades to the table like t track and possibly some dog holes.
My Favorite Tool I Own – Two Car Garage Workshop
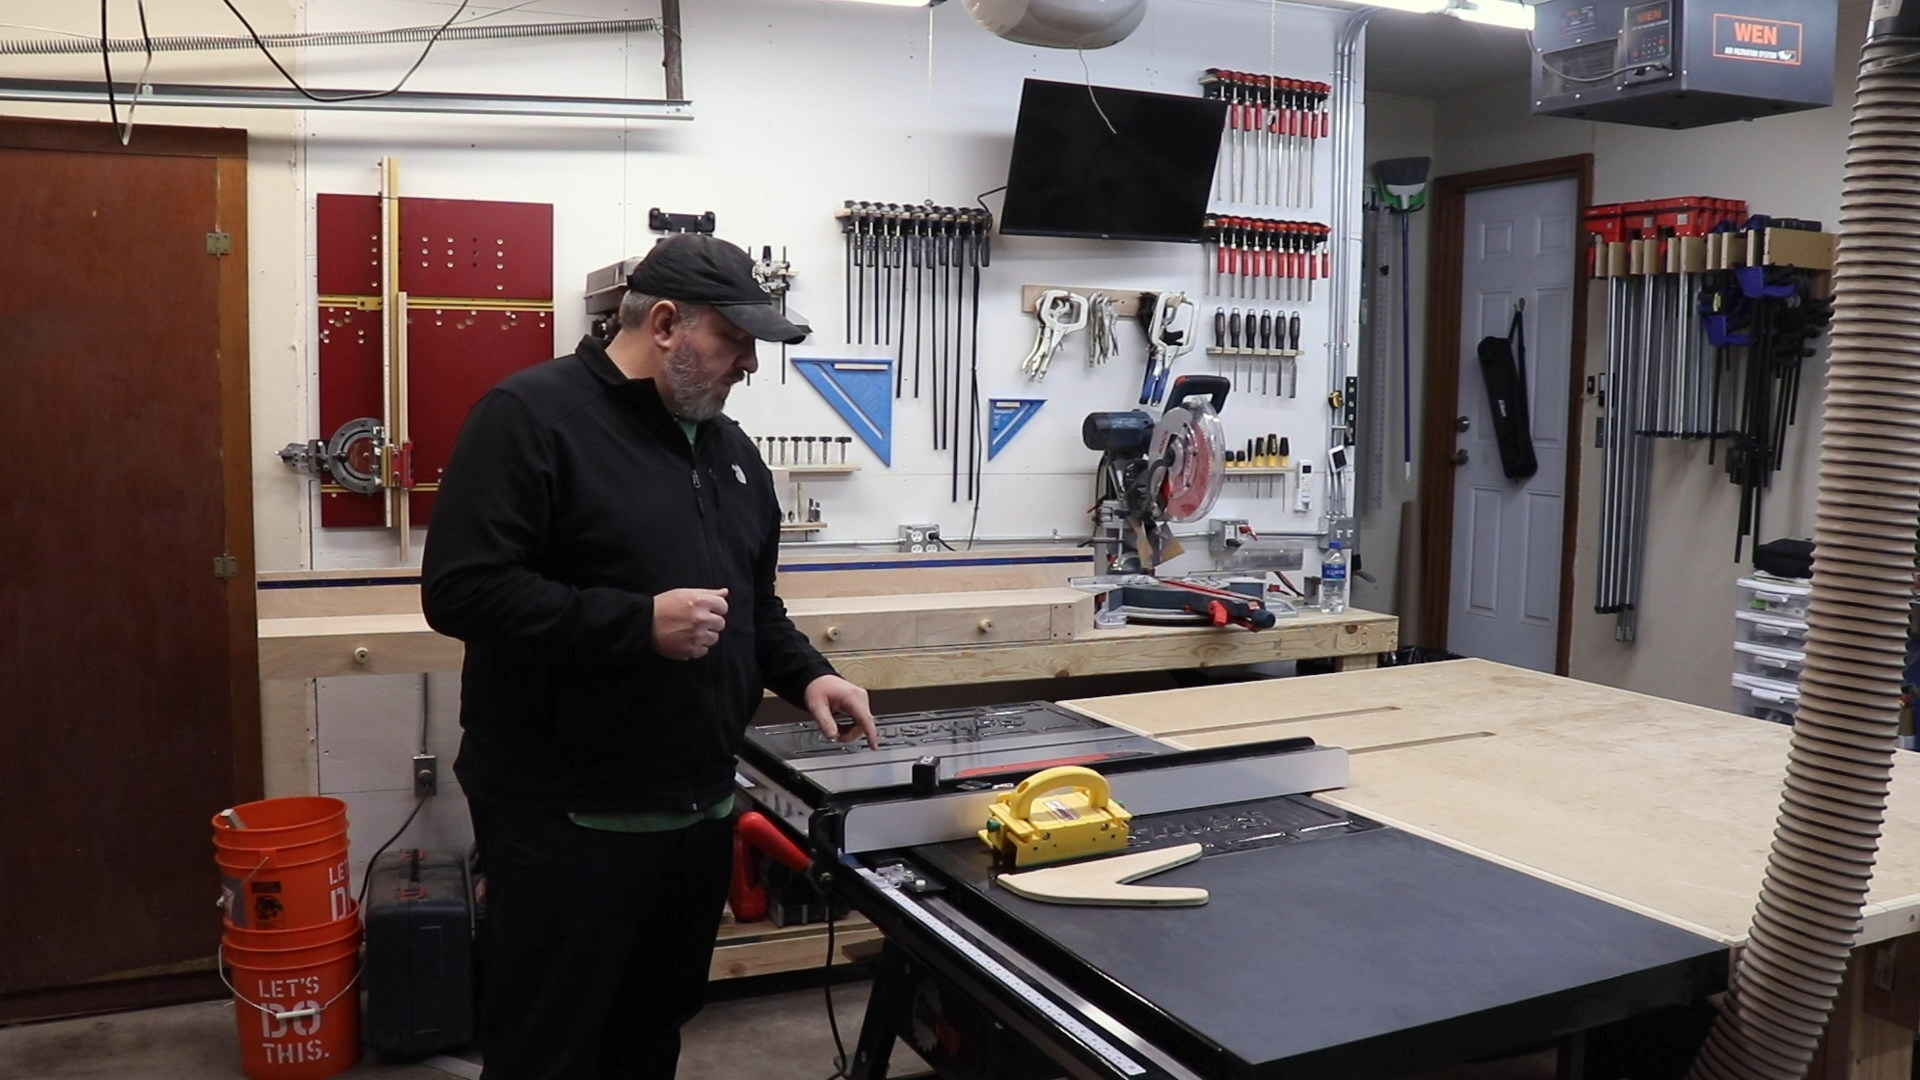
SawStop CNS Contractor Saw
The last stop on my shop tour is at my favorite tool; the SawStop CNS Contractor saw (https://amzn.to/2VZEblw). Having a table saw opened my up to many new possibilities. It’s the cornerstone of my, and most, woodworking shops. I built my assembly/outfeed table to work seamlessly with this saw as it is a contract saw and has the motor handing off of the back.
When I started looking at table saws my budget was around $300 and I was deciding between job site saws from Kobalt and DeWalt. As I was doing research I stumbled upon a forum where there was talk about SawStop. I knew about SawStop but didn’t really think it was in my price range. After reading some of the comments and then watching a video where Jimmy Diresta talked about his table saw injury I made up my mind that I will only get a SawStop. I headed off to my local Woodcraft to look at the SawStop jobsite saw and the salesman did a hell of a job and upsold me to the contractor saw. I am glad he did….kind of.
Buyer’s Remorse
When I bought my saw I did not upgrade to the cast iron wings so my wings are stamped steel. After having the saw for a while I looked into doing the upgrade and it’s about $300. That got me thinking and I went to SawStop’s site and check out what the contractor saw costs with all of the upgrades vs the price of the professional cabinet saw. I was really surprised.

SawStop CNS vs PCS
Once you start adding all of the accessories and upgrades to the CNS you quickly start approaching the cost of the PCS. Based on the prices as of the publishing of this article, there is less than $500 difference. Had I the ability to do it all over again, I would have sprung for the PCS.
All that said, I do love my SawStop and I don’t regret for one second purchasing a SawStop.
That’s All, Folks – Two Car Garage Workshop
That’s a wrap on this shop tour. I hope you take the time to watch the video as well. If you have any questions or comments, please leave them below.
Here is a list of all of my shop projects mentioned in this article:
- Mini Split Installation
- Scrap Wood Storage Cart
- Router Table Cabinet
- Drill Press Table
- Clamp Racks
- Assembly/Outfeed Table
Here is a list of the major tools I use in my shop:
Stationary and Benchtop Power Tools – Two Car Garage Workshop
- Sawstop 1-3/4 HP Contractor Saw with 36-Inch Professional T-Glide Fence – http://amzn.to/2Gw9r3O
- WEN 10″ Bandsaw – http://amzn.to/2Cyu2SW
- WEN 12″ Benchtop Drill Press – http://amzn.to/2EKahNZ
- DeWalt DW735 13-Inch, Two Speed Thickness Planer – http://amzn.to/2sPcKkX
- WEN Oscillating Spindle Sander – http://amzn.to/2GxGaWK
- WEN 4″x36″ Belt and 6″ Disc Sander – http://amzn.to/2Czg03g
- Bosch 12″ Glide Miter Saw – http://amzn.to/2BF8xTr
- Steelex ST1011 8” Jointer with Helical-Style Cutterhead – https://www.woodstockint.com/products/ST1011
- California Air Tools 2 HP, 10 gallon Ultra Quiet Air Compressor – http://amzn.to/2ETOanL
Dust Collection – Two Car Garage Workshop
- Oneida 1.5 HP Mini Gorilla – http://amzn.to/2FiDIE2
- Oneida Dust Deputy – http://amzn.to/2CytIDy
- POWERTEC 2 1/2″ Dust Collection Hose – http://amzn.to/2sJxCd6
- Shop-Vac 6.5 Peak HP 14 Gallon Wet/Dry Vacuum – http://amzn.to/2BD2jDL
- Dust Right Quick Change Multi-Port Tool Set – http://amzn.to/2Cza8qV
Hand Held Power Tools – Two Car Garage Workshop
- DeWalt 5″ Random Orbital Sander – http://amzn.to/2sEAeco
- DeWalt 20-Volt MAX Drill and Impact Driver Combo Kit – http://amzn.to/2C9O9uK
- Craftsman 19.2 Volt Reciprocating Saw – http://amzn.to/2CBtsnv
- DeWalt 20-Volt MAX Jigsaw – http://amzn.to/2GwbfK8
- DeWalt 20-Volt MAX Oscillating Multi-Tool – http://amzn.to/2FhWNWX
- Craftsman 19.2 Volt Heavy Duty Impact Wrench – http://amzn.to/2CAUaML
- DeWalt 7-1/4″ Circular Saw with Electric Brake – http://amzn.to/2omvJgW
- Bosch MRC23EVSK 2.25 HP Plunge & Fixed-Base Router – http://amzn.to/2onNJHT
- DeWalt Plate Joiner – http://amzn.to/2EWHTYb
- Ridgid Trim Router – http://amzn.to/2CCkXbs
Accessories & Clamps – Two Car Garage Workshop
- Kreg K4 Pocket Hole System – http://amzn.to/2EUkeb8
- Kreg R3 Jr. Pocket Hole Jig – http://amzn.to/2FjAKPy
- Bessey K Body REVO 24″ Parallel Clamp – http://amzn.to/2BHtxZP
- MICROJIG GRR-RIPPER 3D Pushblock – http://amzn.to/2CBgp5k
- Bessey 12″ Clutch Bar Clamp – http://amzn.to/2BHtxZP
- Bessey 6″ Clutch Bar Clamp – http://amzn.to/2BHLw2c
- MICROJIG GRR-RIP BLOCK Smart Hook Pushblock – http://amzn.to/2CCcuoK
Metalworking – Two Car Garage Workshop
- Lincoln Electric Power Mig 210 MP – https://amzn.to/2F8AVO8
- DeWalt 60-Volt MAX FLEXVOLT Grinder with Kickback Brake Kit – http://amzn.to/2BFYNbK


3 Comments
Did you have a video or build article on how you made the recently added pipe vice to your assembly table?
Do you believe the assembly table could have been made entirely out of plywood and be strong enough?
Hey Rob, no video on the pipe clamp vise. There are a few on YouTube. It was really easy though. Just drill some holes and slide the pipes through. I think Jackman Works has a good video on building one of these.
Yes, there are a lot of people that have made an assembly table out of only plywood. No problem there. I just wanted a really easy frame to build which is why I went with 2x material. If I had to do it all over again I would make it out of plywood but it would also look quite a bit different. Shawn Stone (https://stoneandsons.net/outfeedassembly-table-part-1-design/) and Crafted Workshop (https://craftedworkshop.com/blog/ultimate-t-track-assembly-outfeed-table-with-systainer-storage-how-to-build-woodworking) both have good videos on assembly tables.
[…] ● https://www.theaveragecraftsman.com/shop-tours/2019-two-car-garage-shop-tour/ […]